Like so many of you, Fall is my favorite time of year. And since most of us will be heading to the pumpkin patch {or down Washington Street!} for a pop of orange or white, I wanted to share two fun pumpkin DIYs that are sure to brighten up your home.
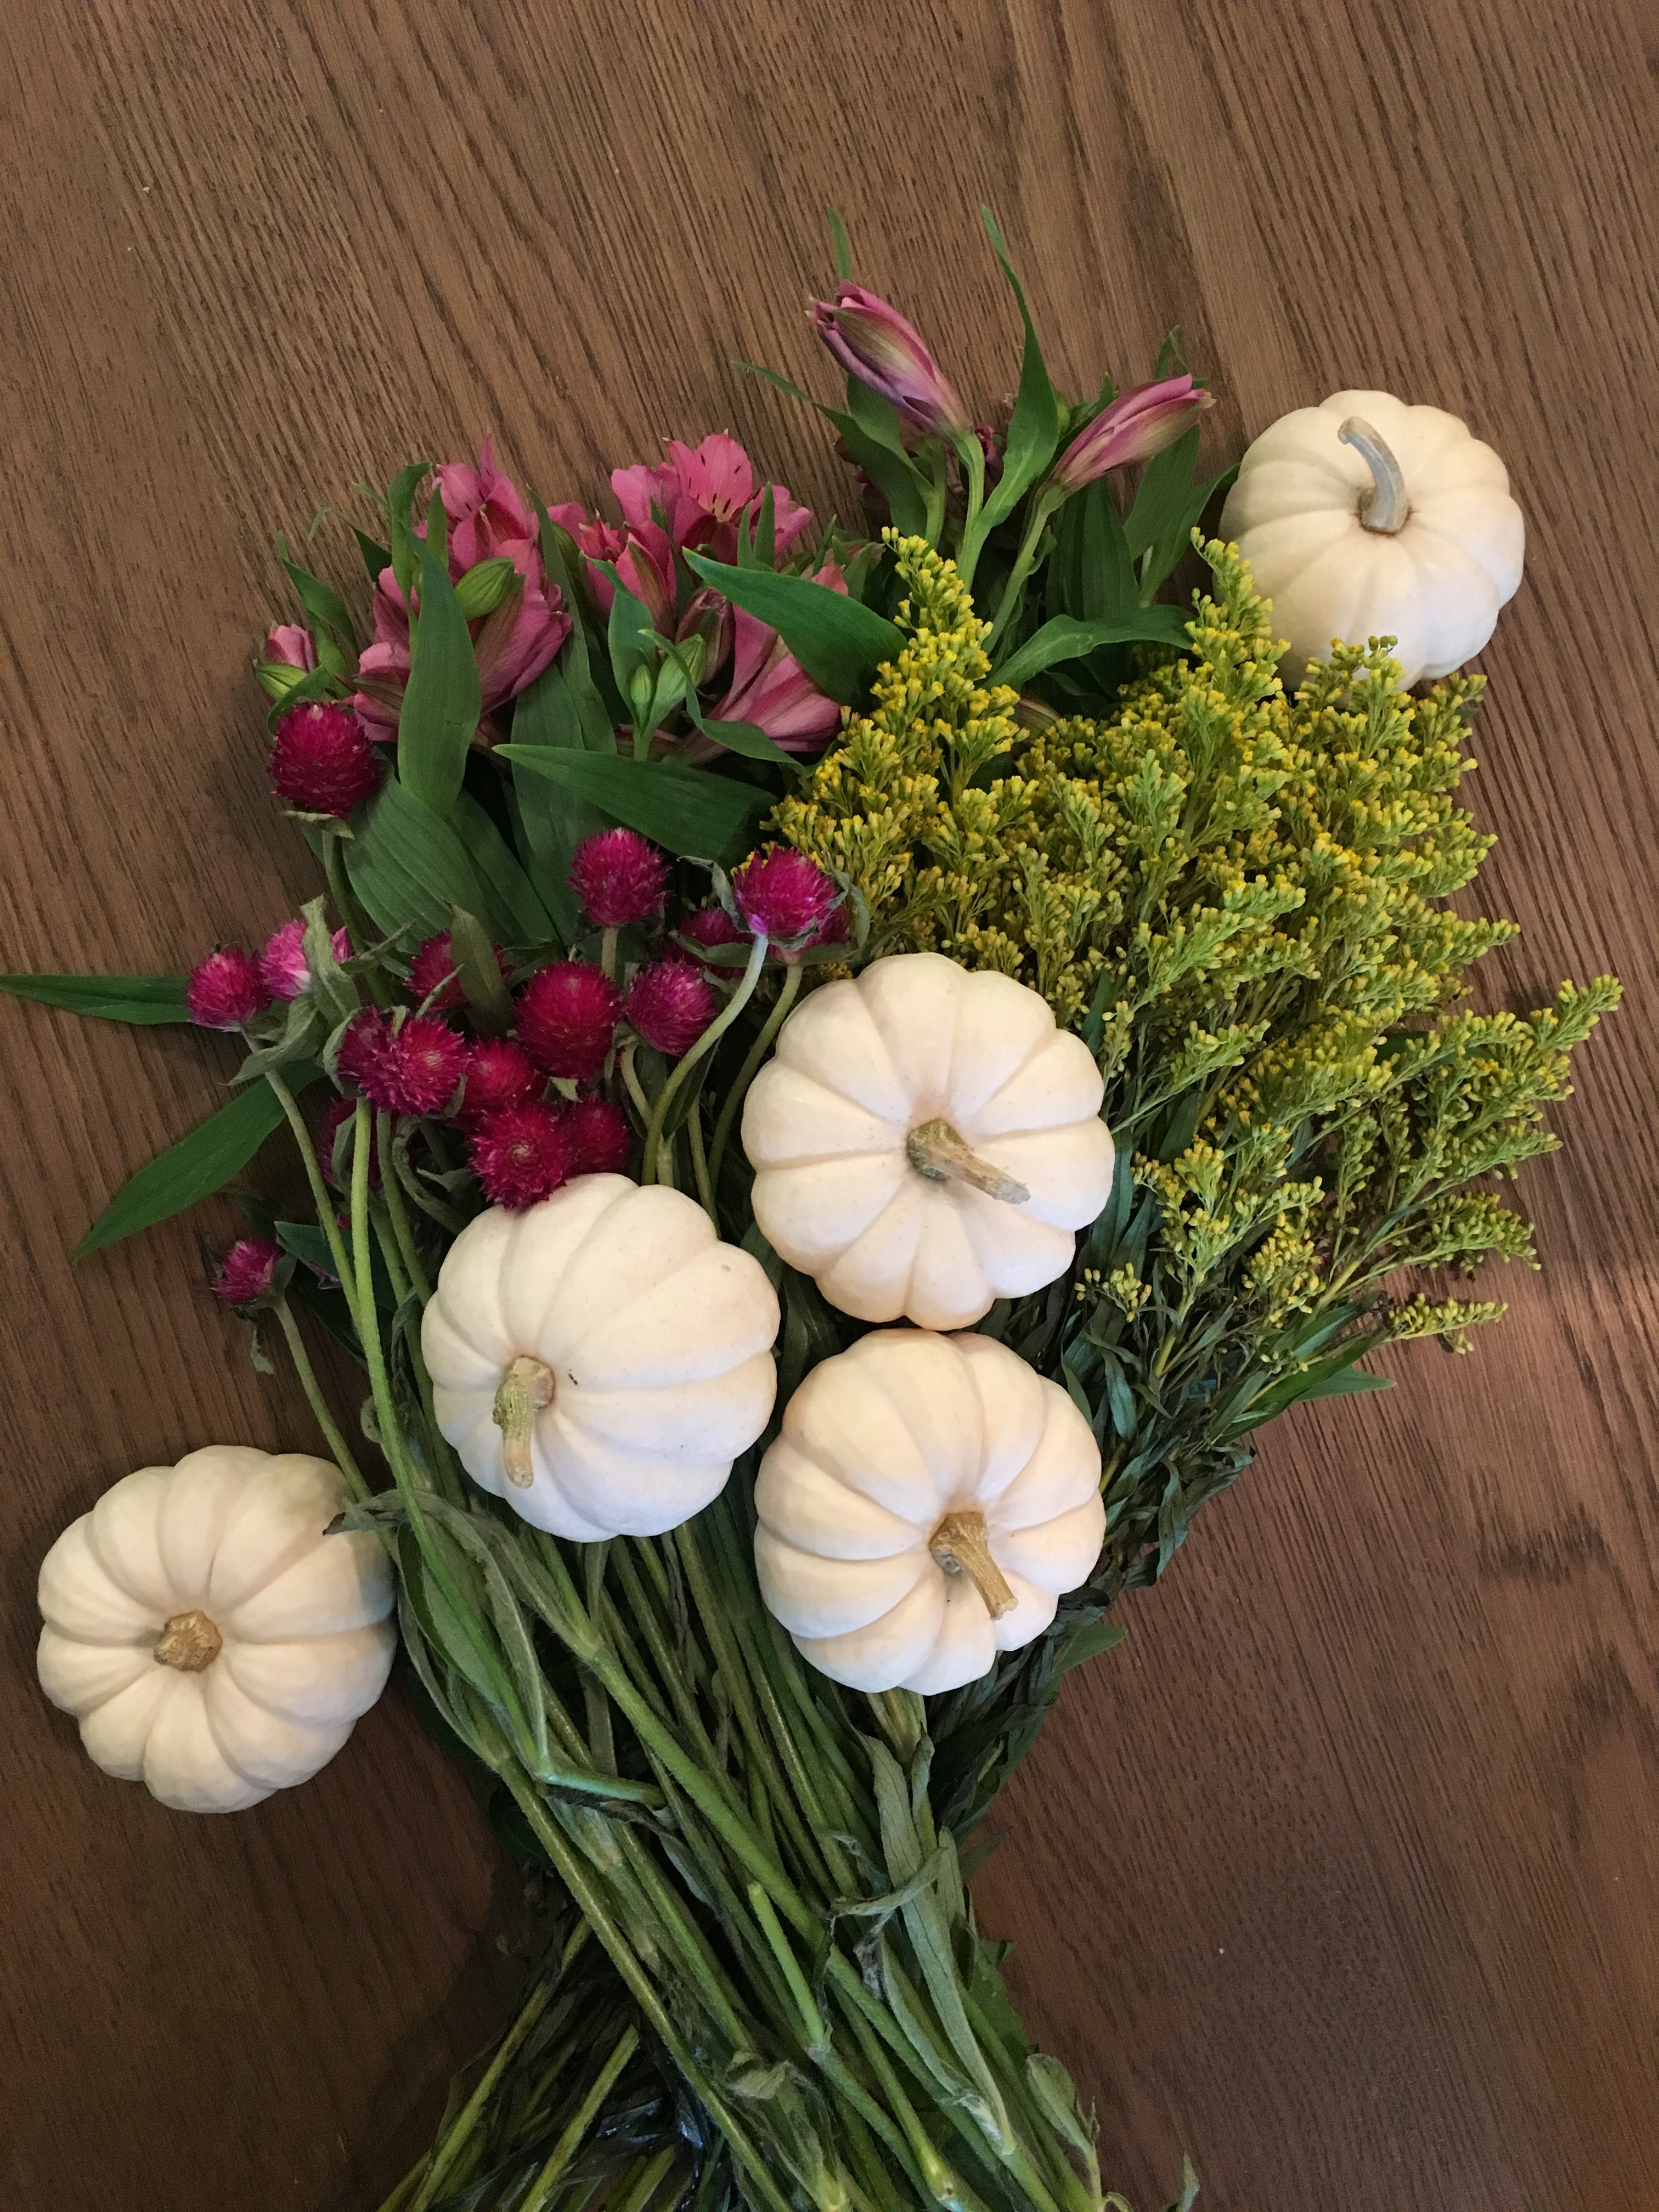
What you’ll need for DIY #1:
- An assortment of tiny pumpkins {I used white pumpkins, but orange would be just as cute!}
- Three different bunches of fresh flowers {choose whichever flowers you like!}
- Scissors
- Hot glue gun
First, wash your tiny pumpkins so there isn’t any dirt on them. I just use a mild soap and water – and then let them dry.
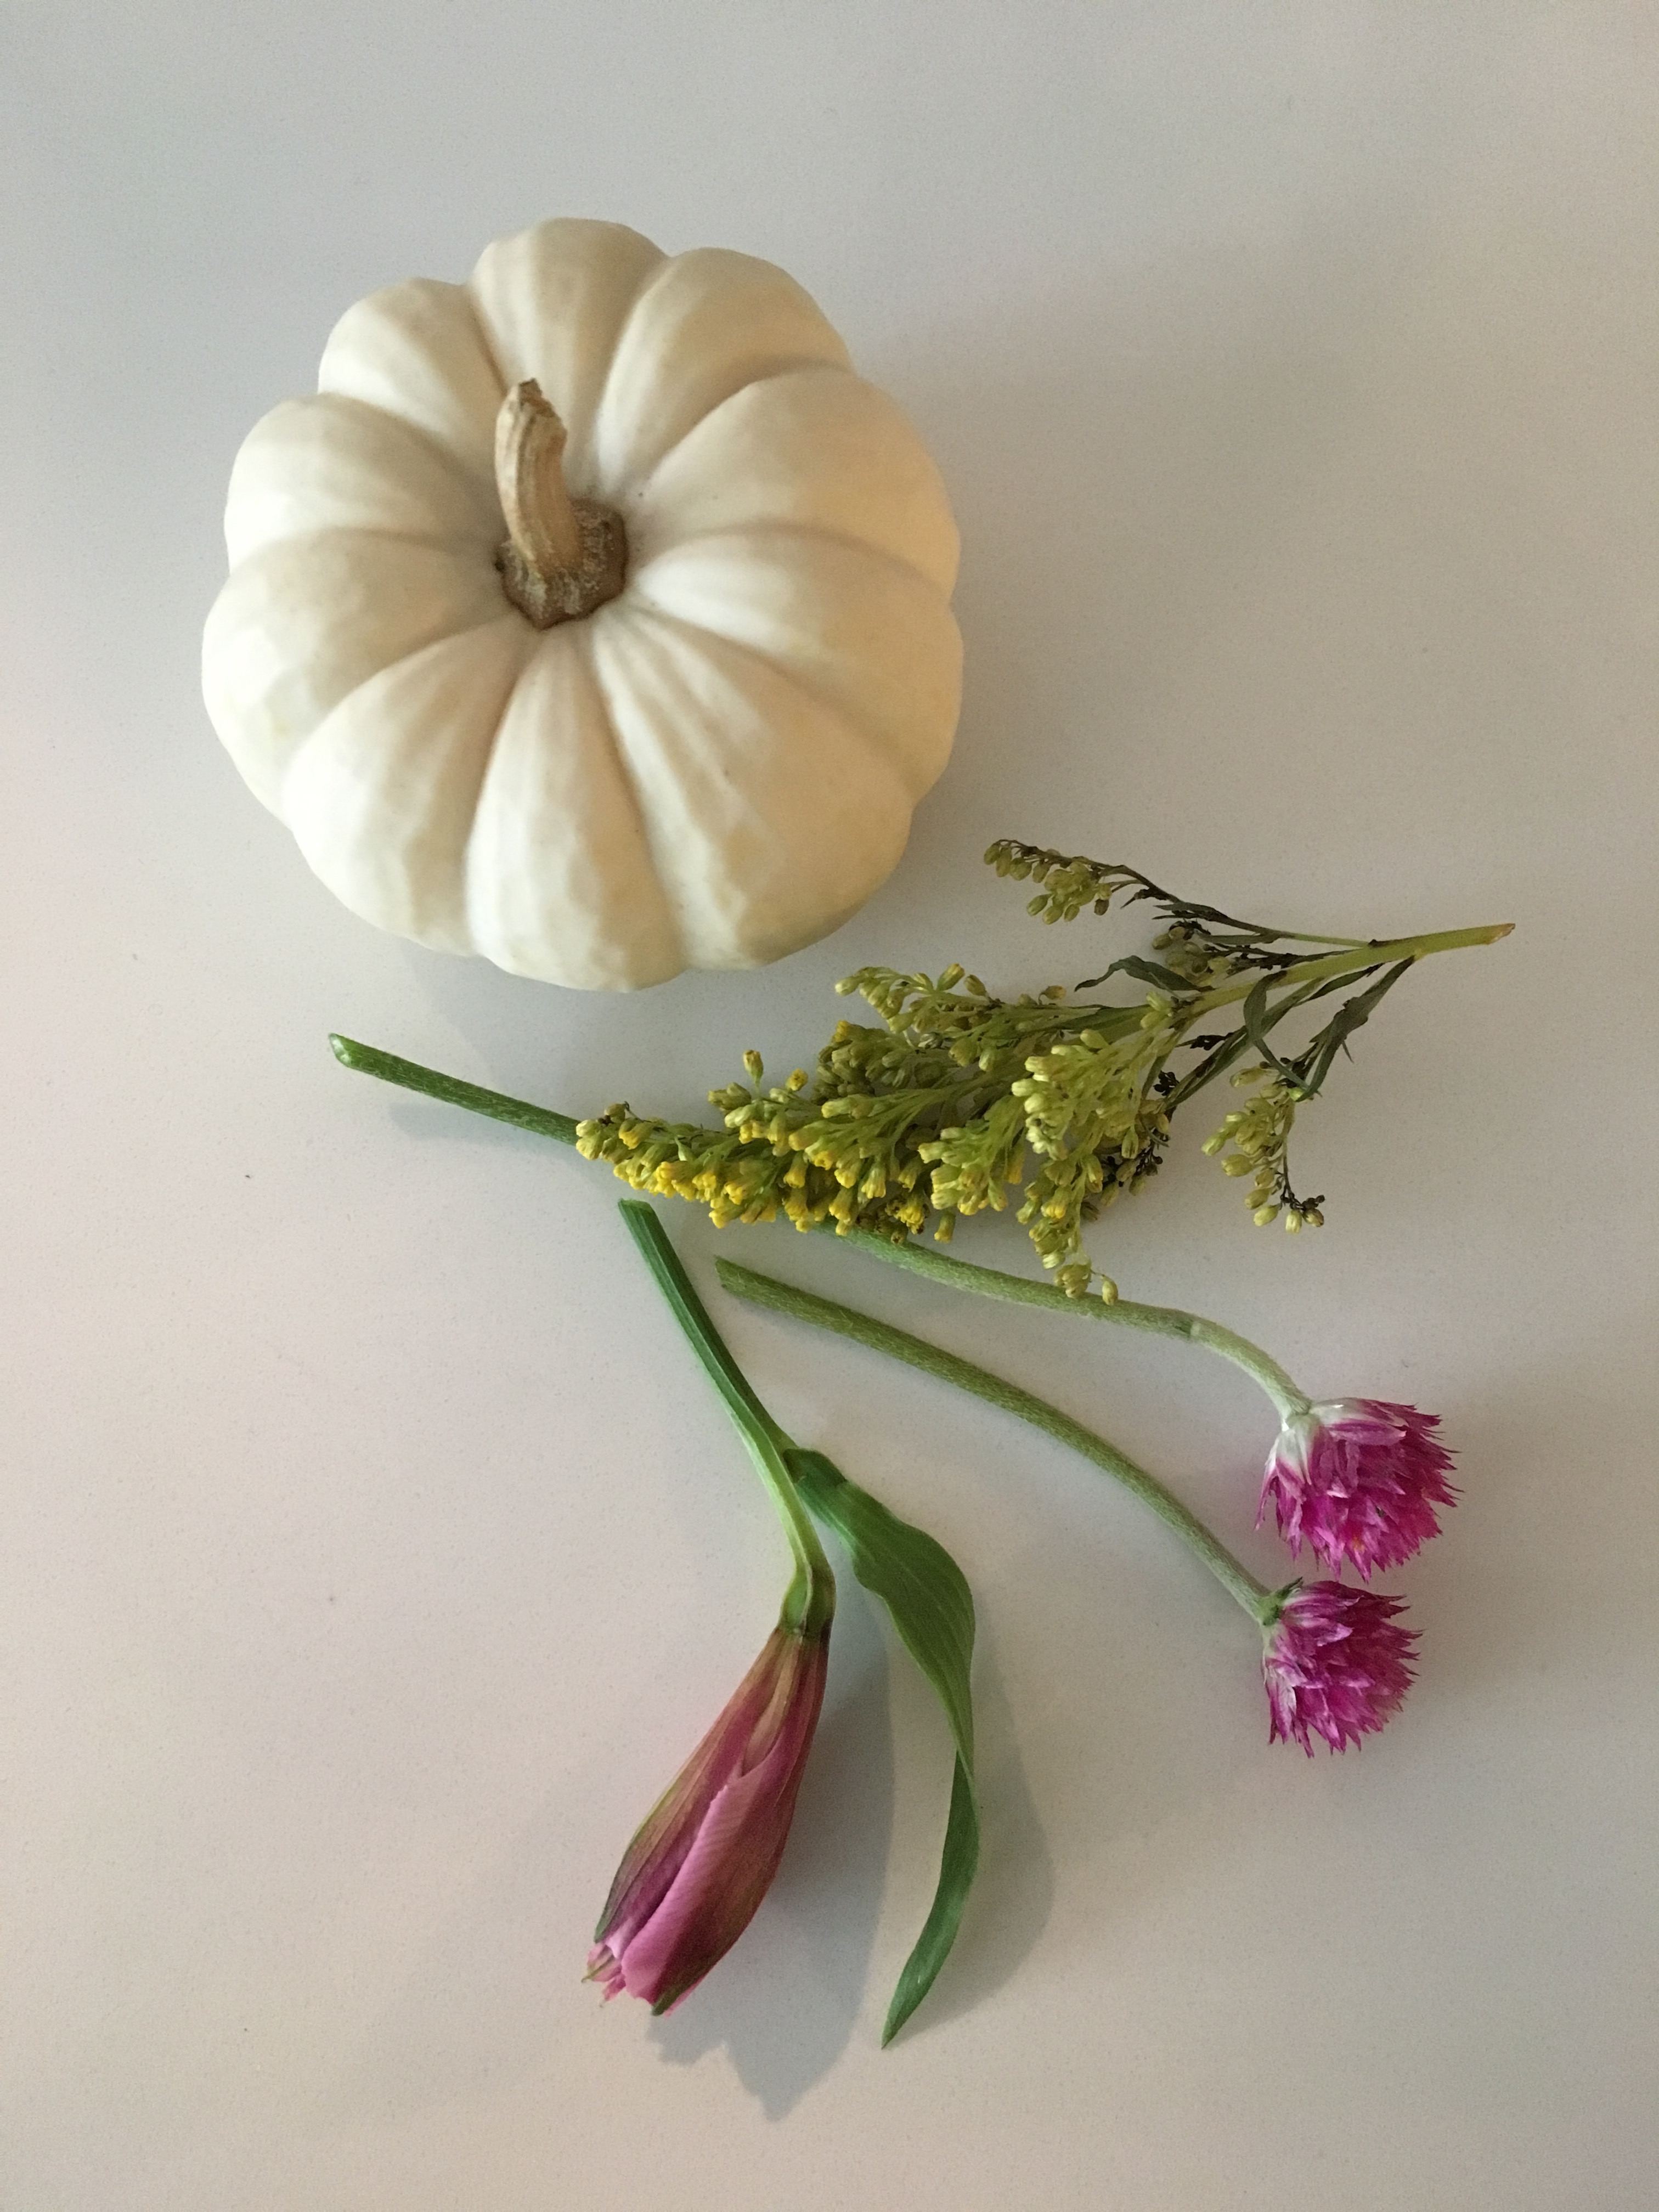
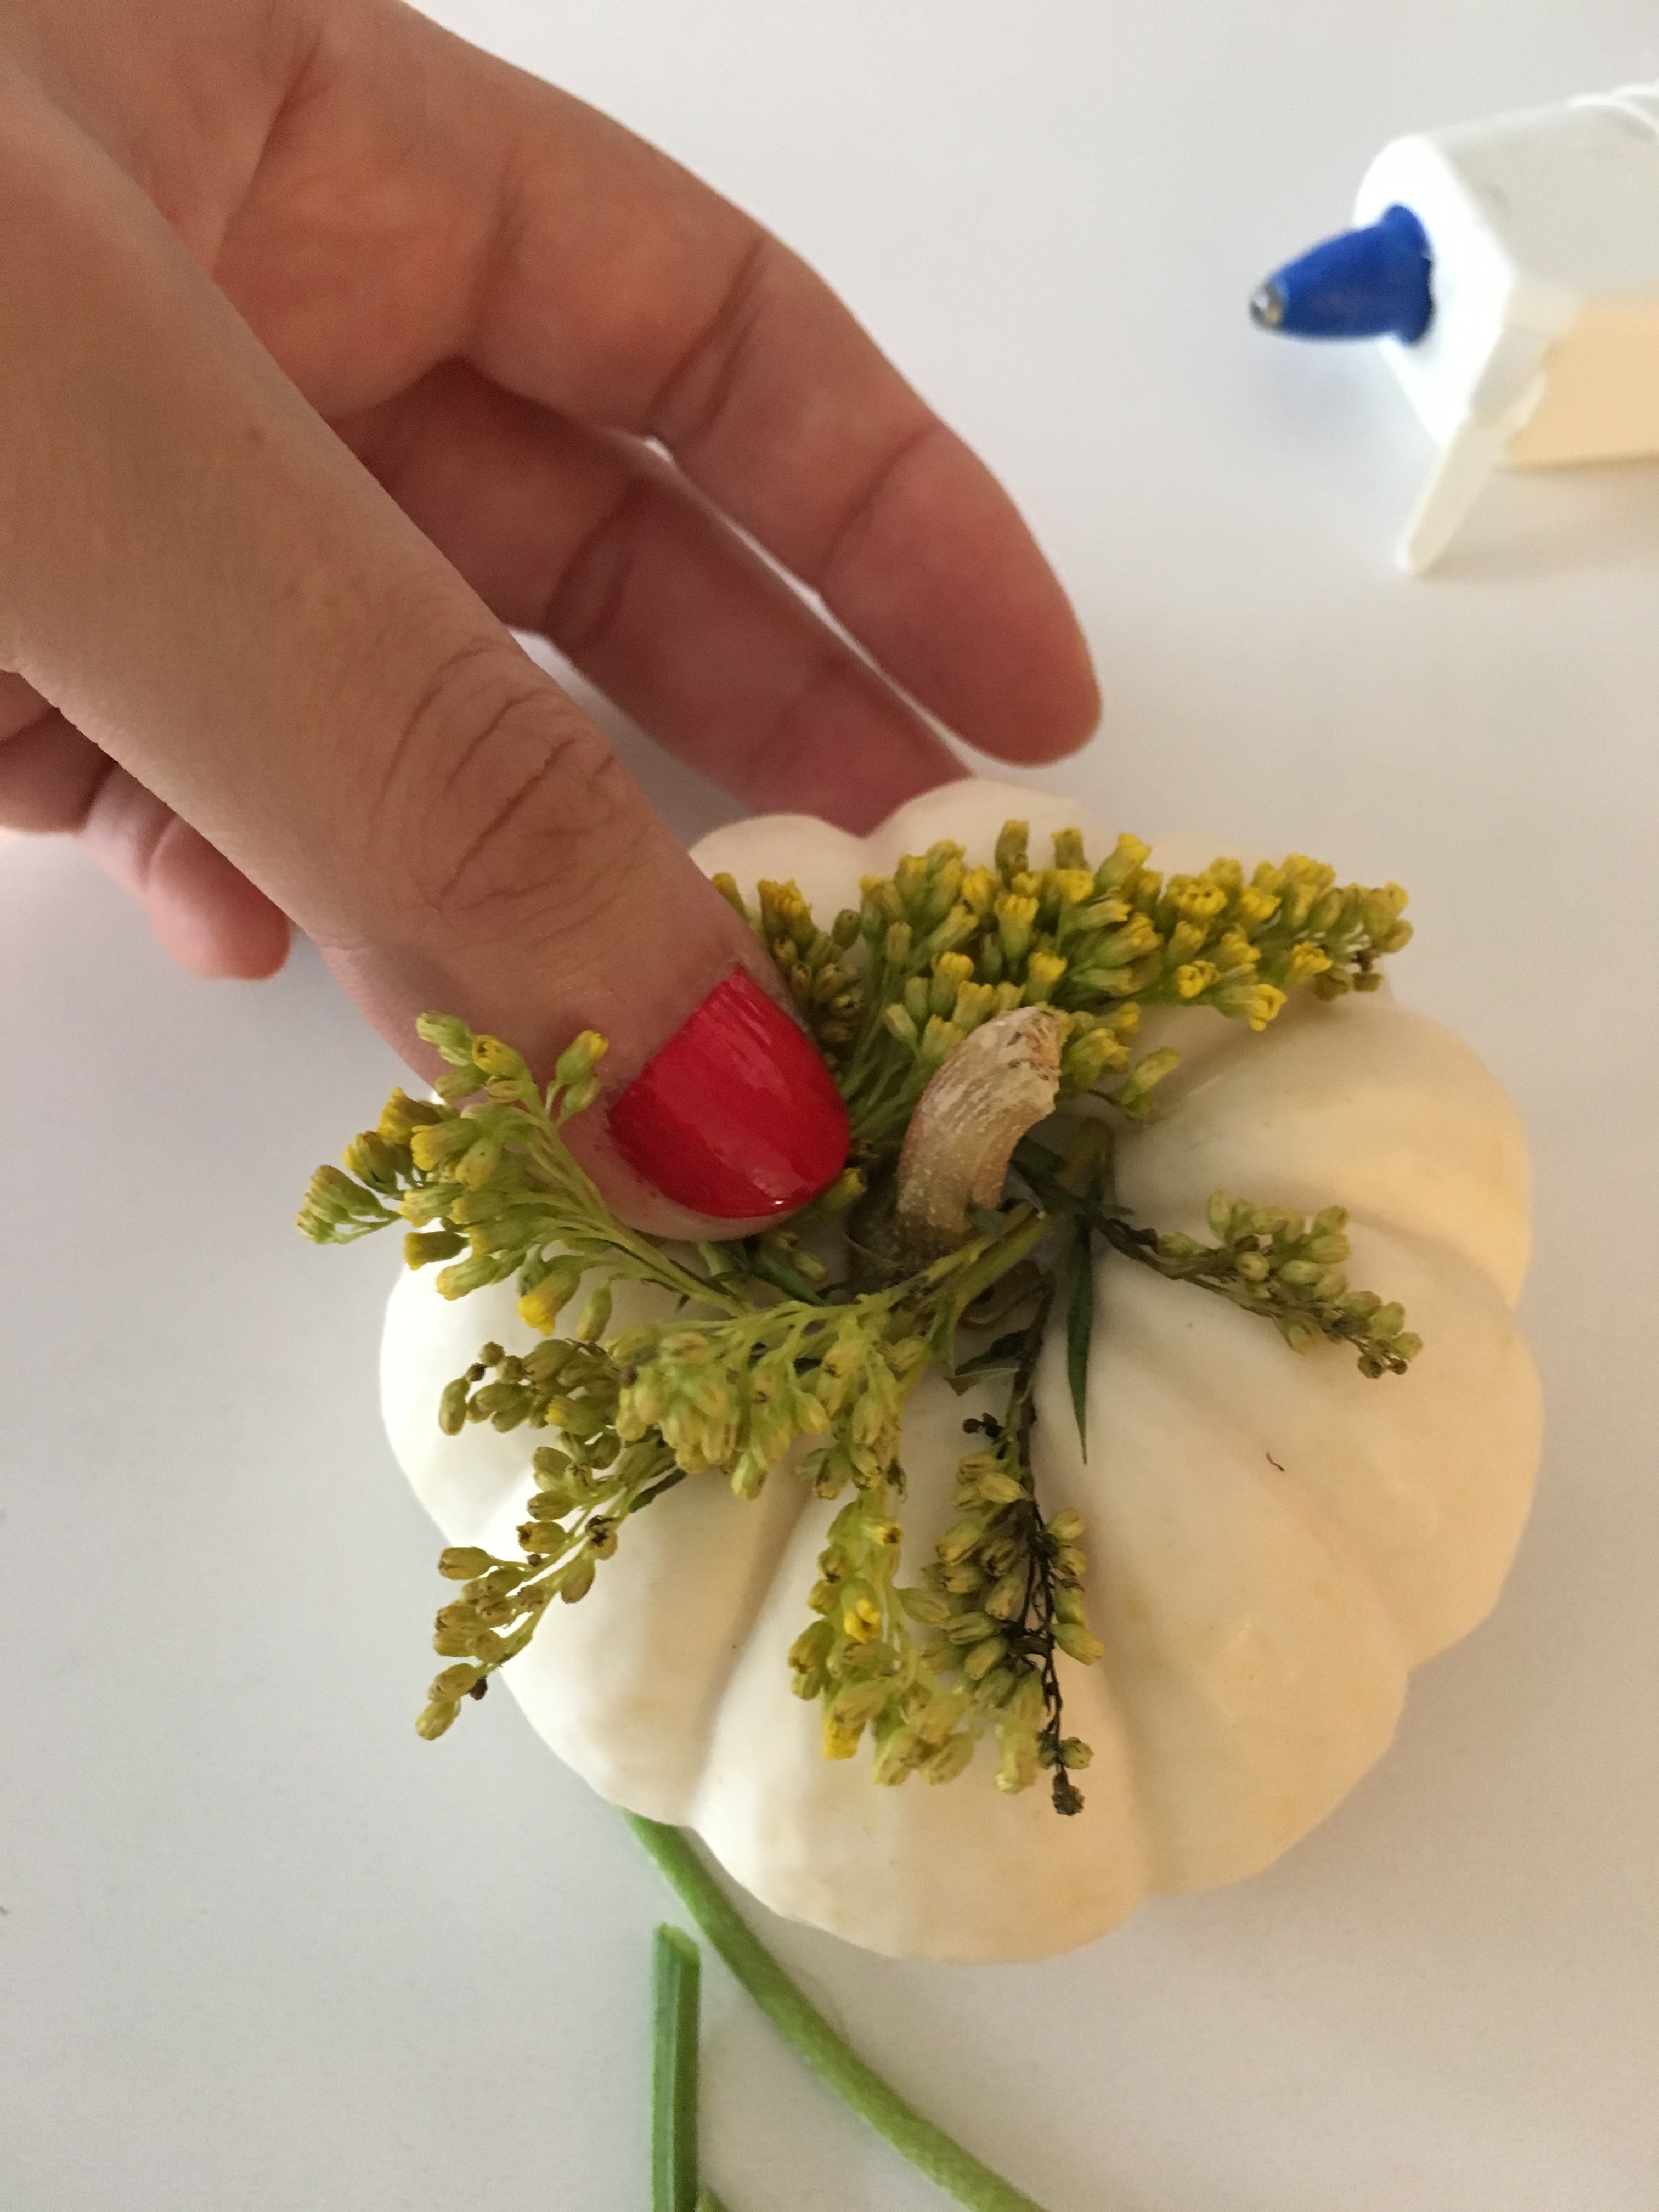
Next, grab one of each kind of flower and snip them with scissors so that just the flower and a small amount of the stem are left.


Wrap the stem of the first flower around the top of the pumpkin and secure with 1-2 drops of hot glue.
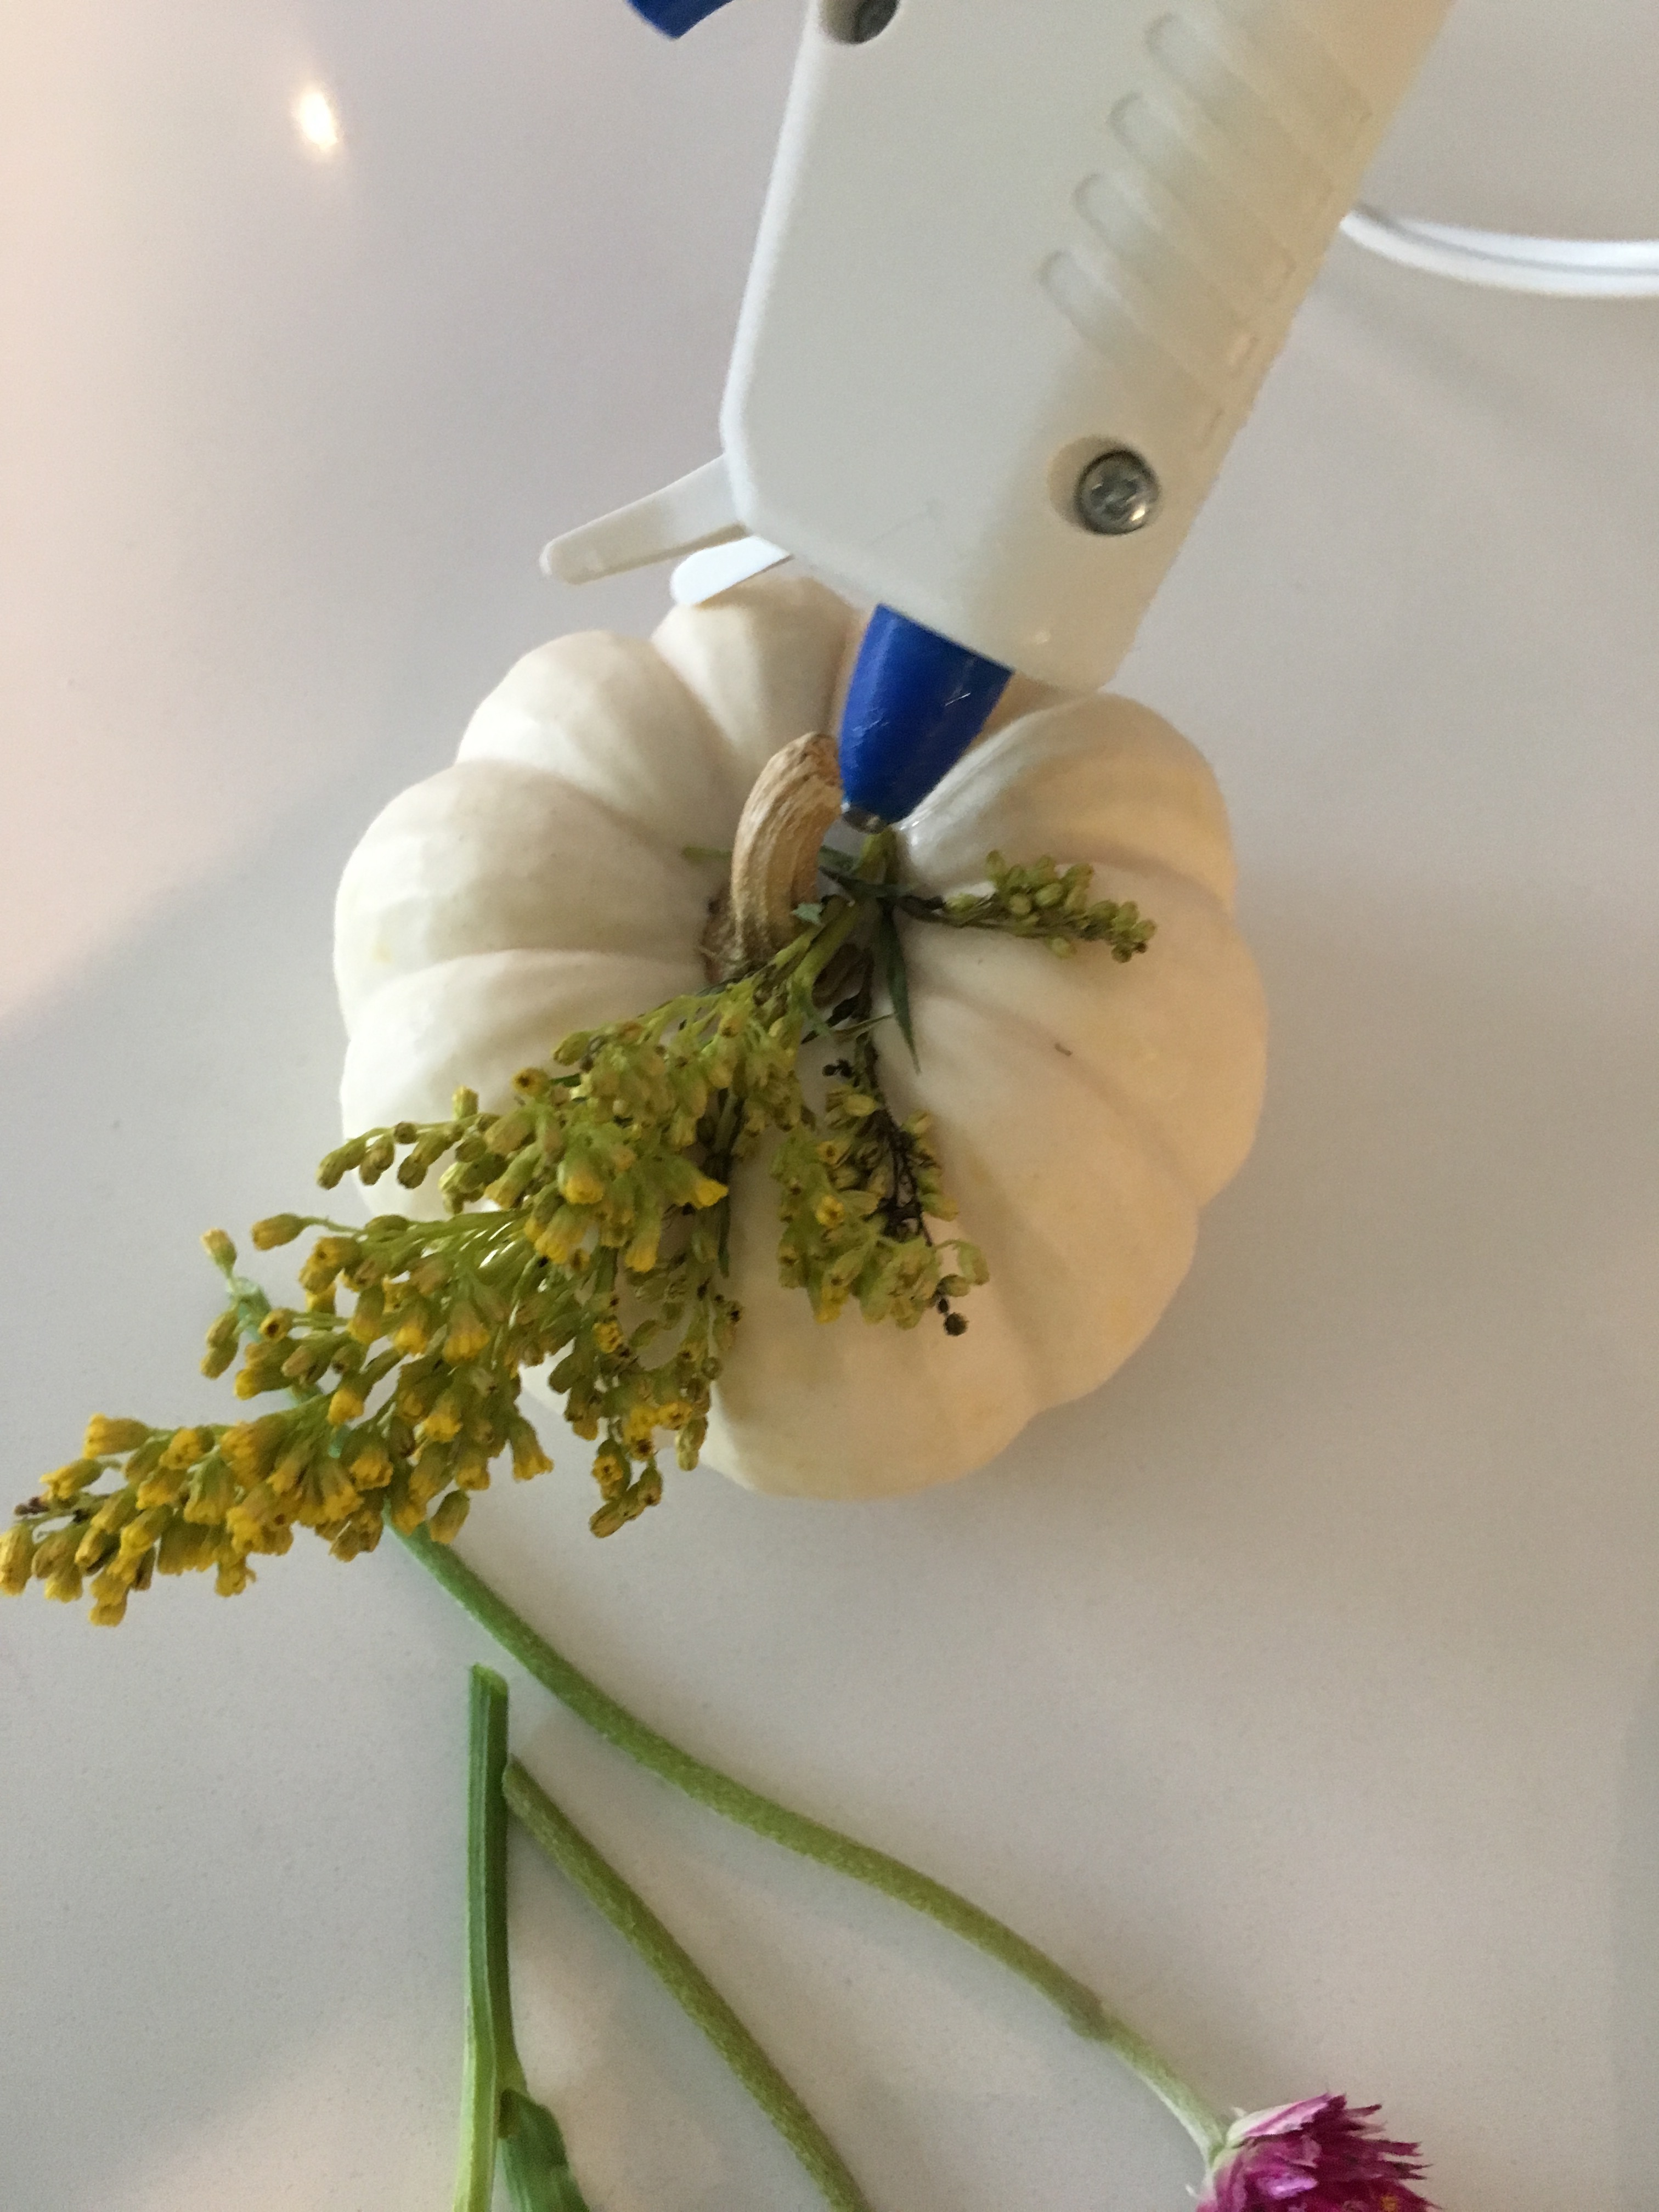

Continue wrapping the flower stem around the pumpkin stem until it resembles a tiny wreath and then add one last drop of glue.
Then, grab a second {different} type of flower and secure it to the pumpkin with one dot of glue.
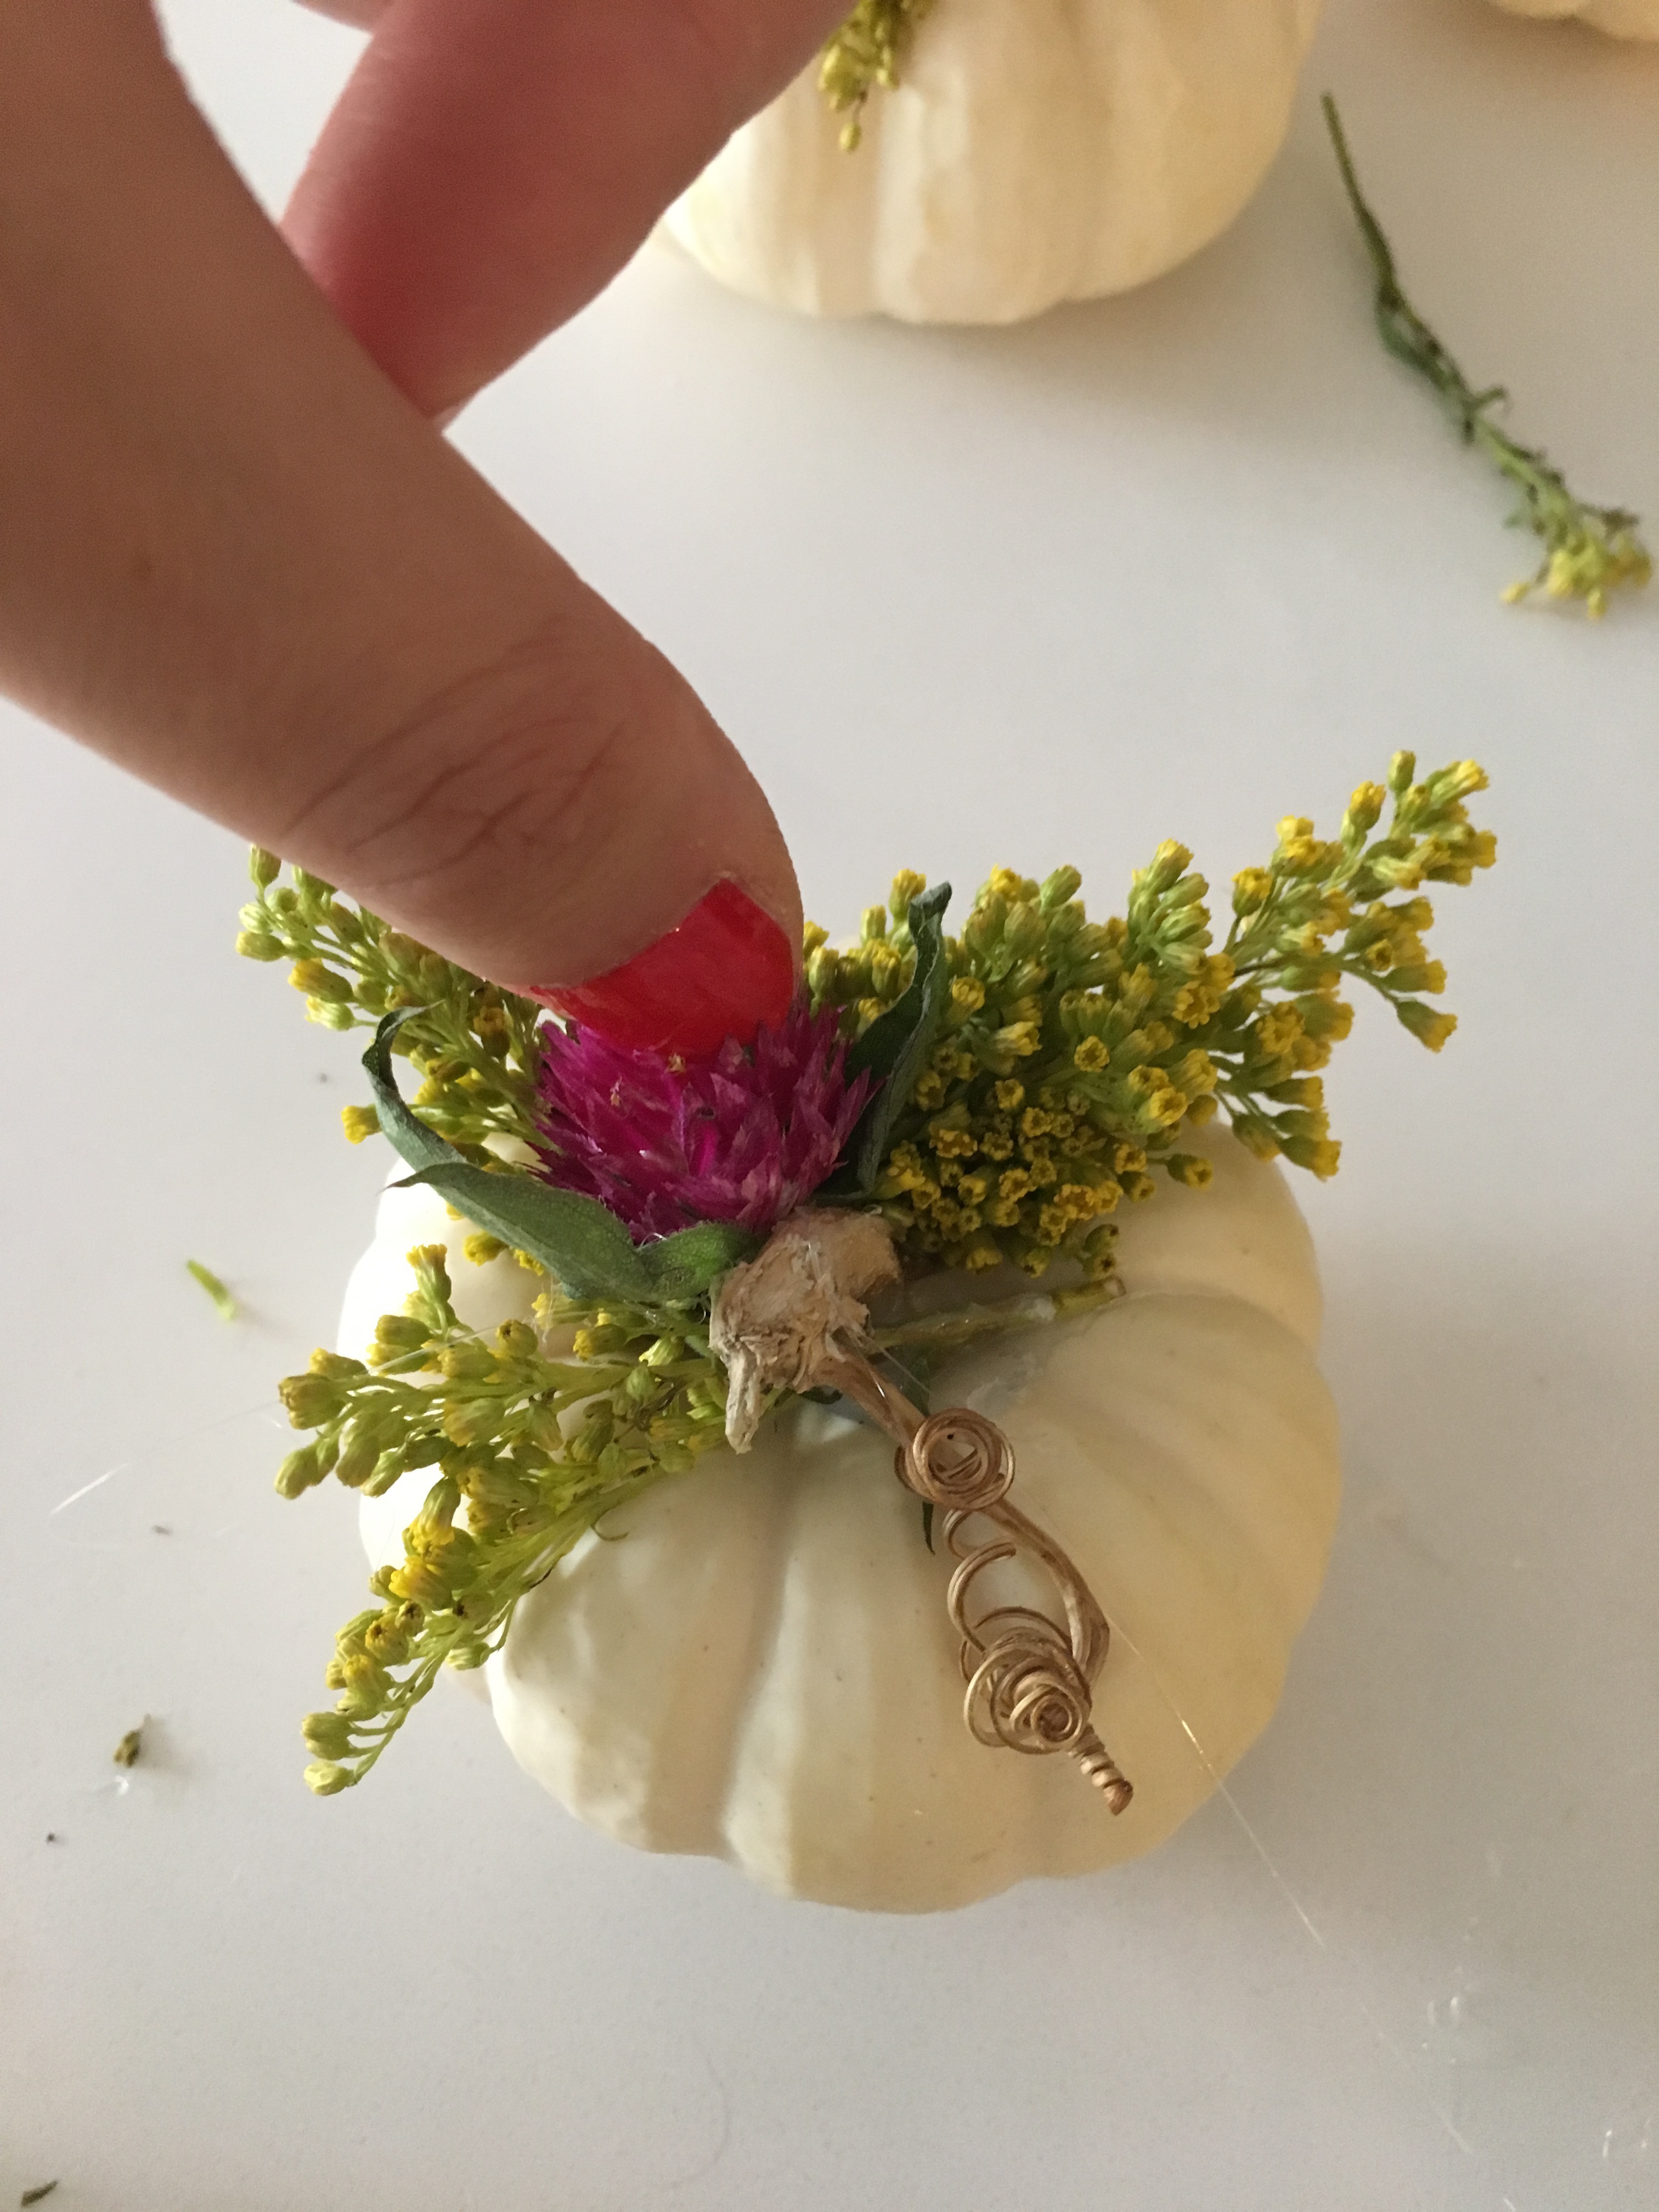
Note: Use only a very small amount of hot glue because it’s all you need! The goal is to apply just enough to secure each flower. You really want the flowers to appear as though they’re resting lightly on top of the pumpkin.
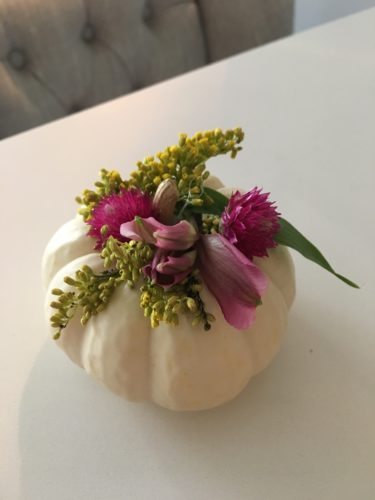
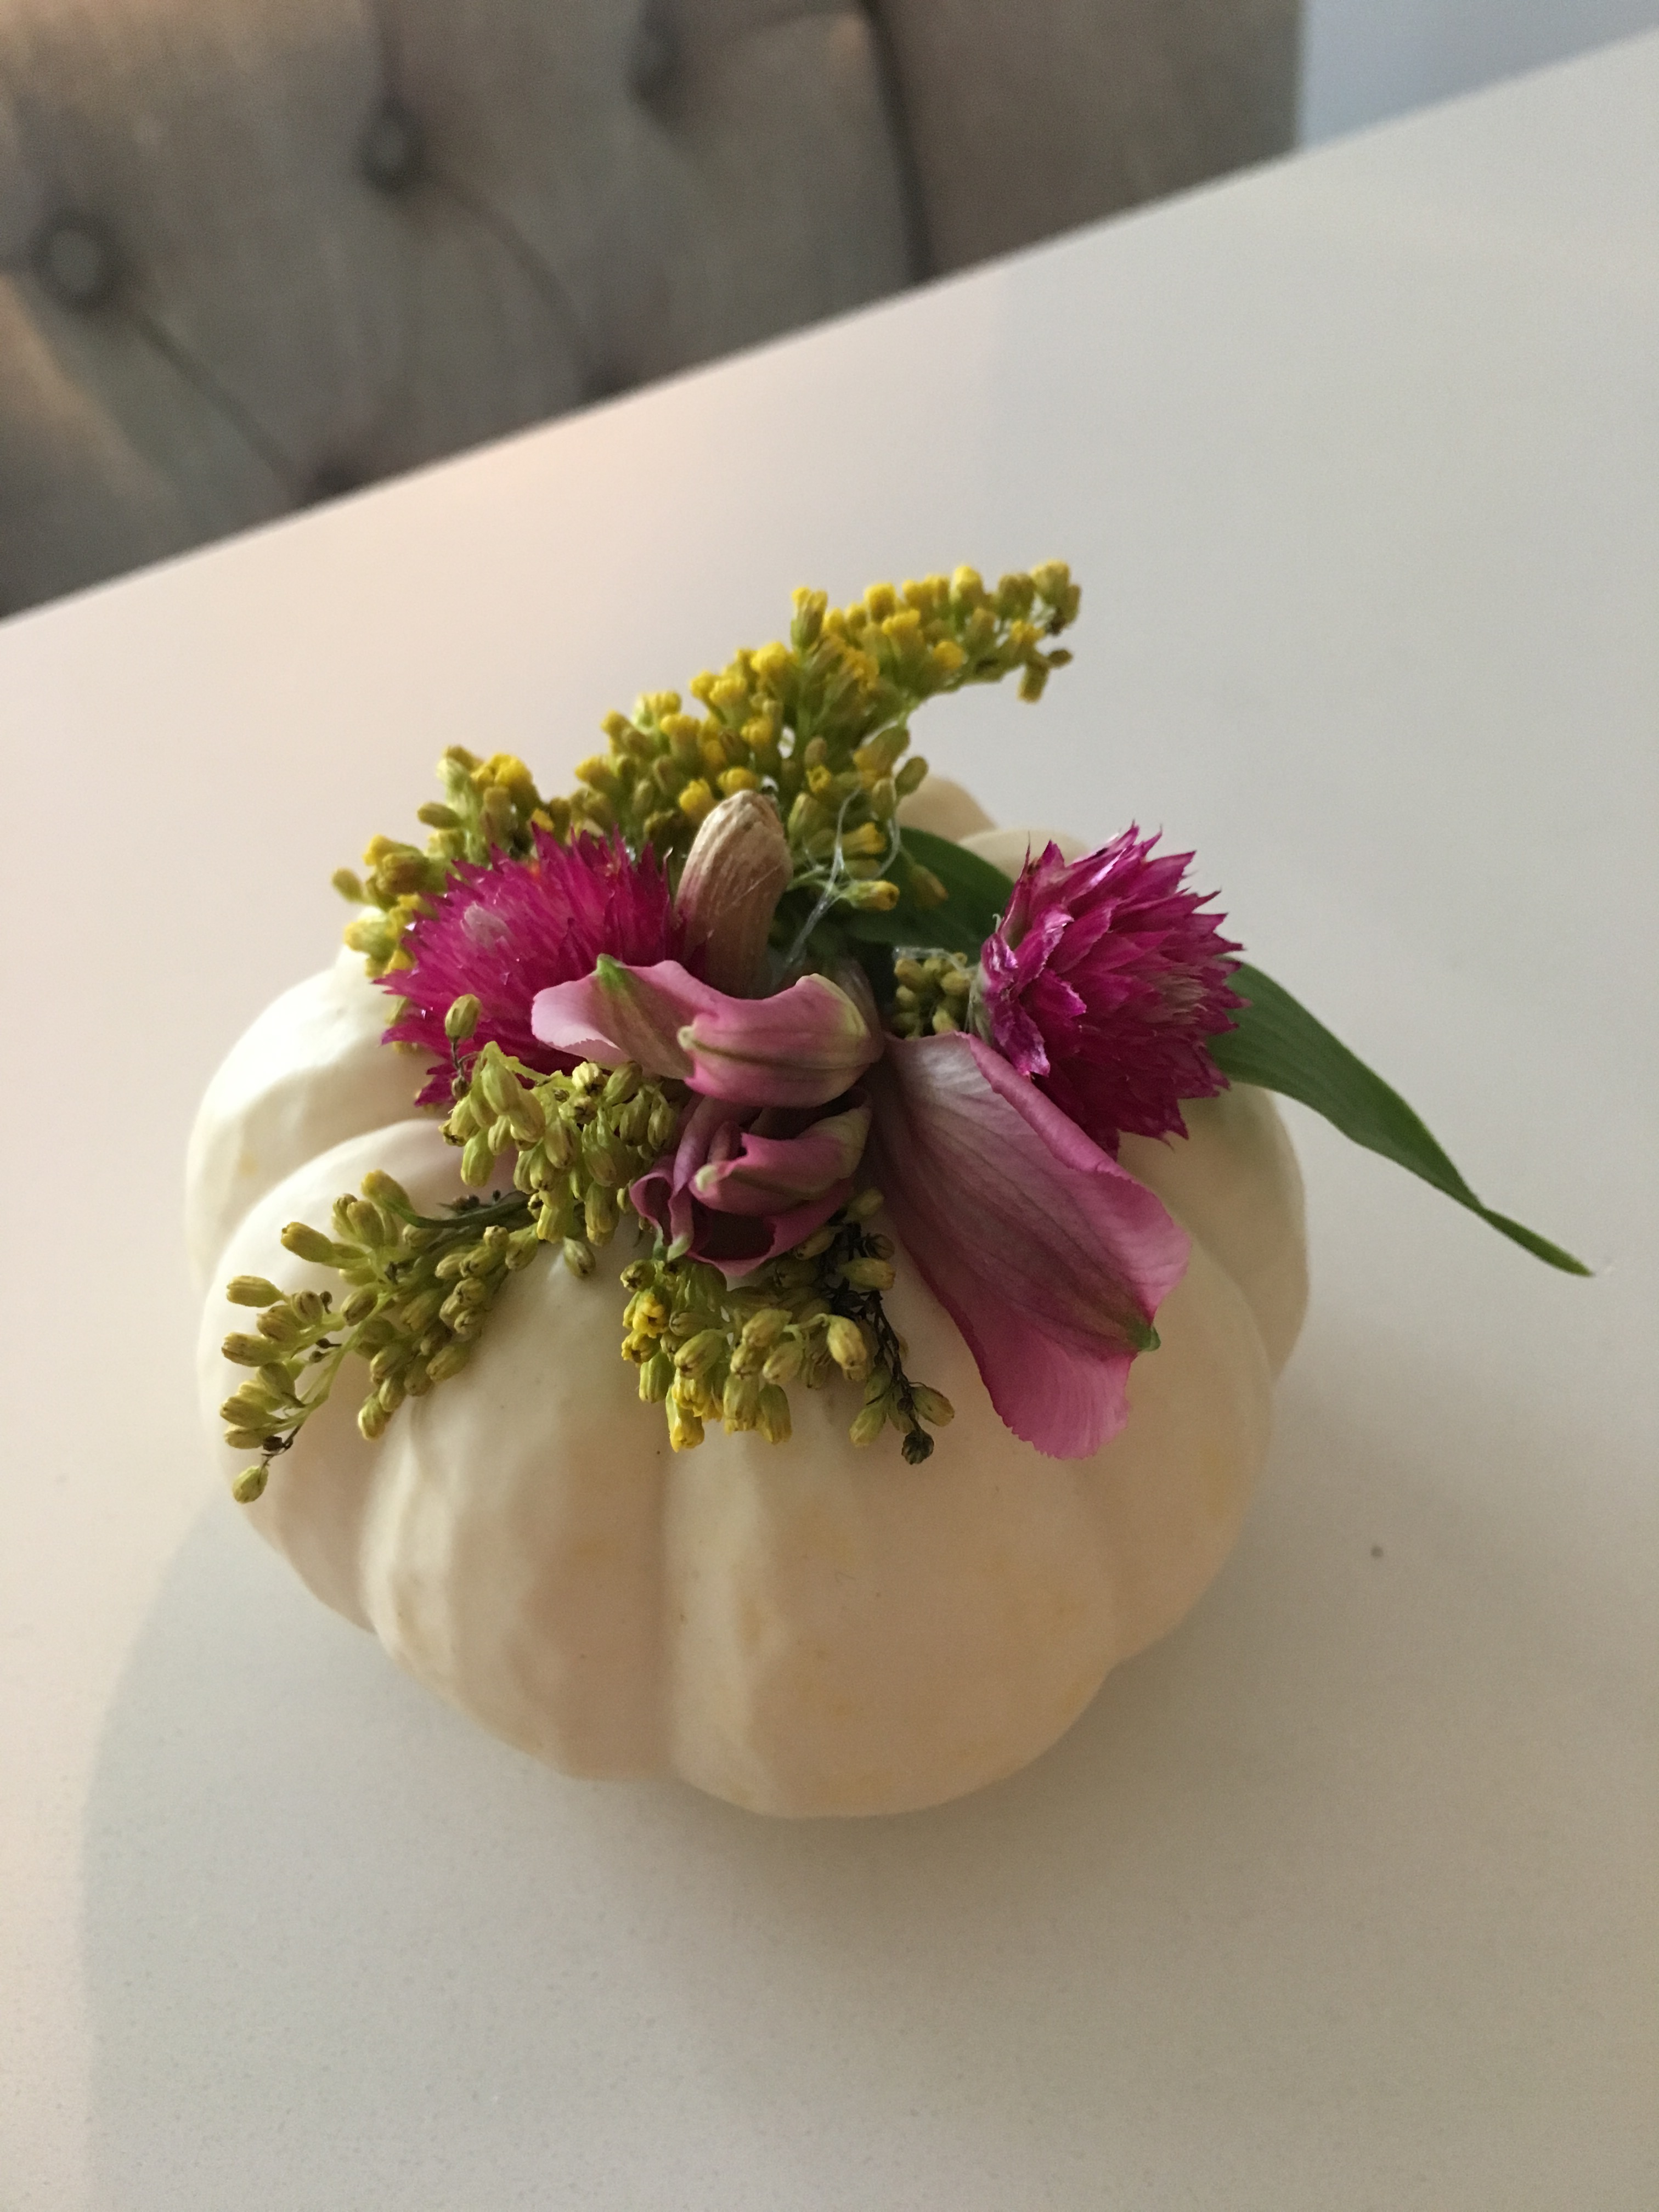
Then, take your last flower and glue it on top as well. The good thing about this project is that there’s no wrong way to glue the flowers {and every pumpkin/flower combo will be different!} It will all depend on the size of your pumpkin{s} and the types of flowers you choose. See the beautiful finished product:
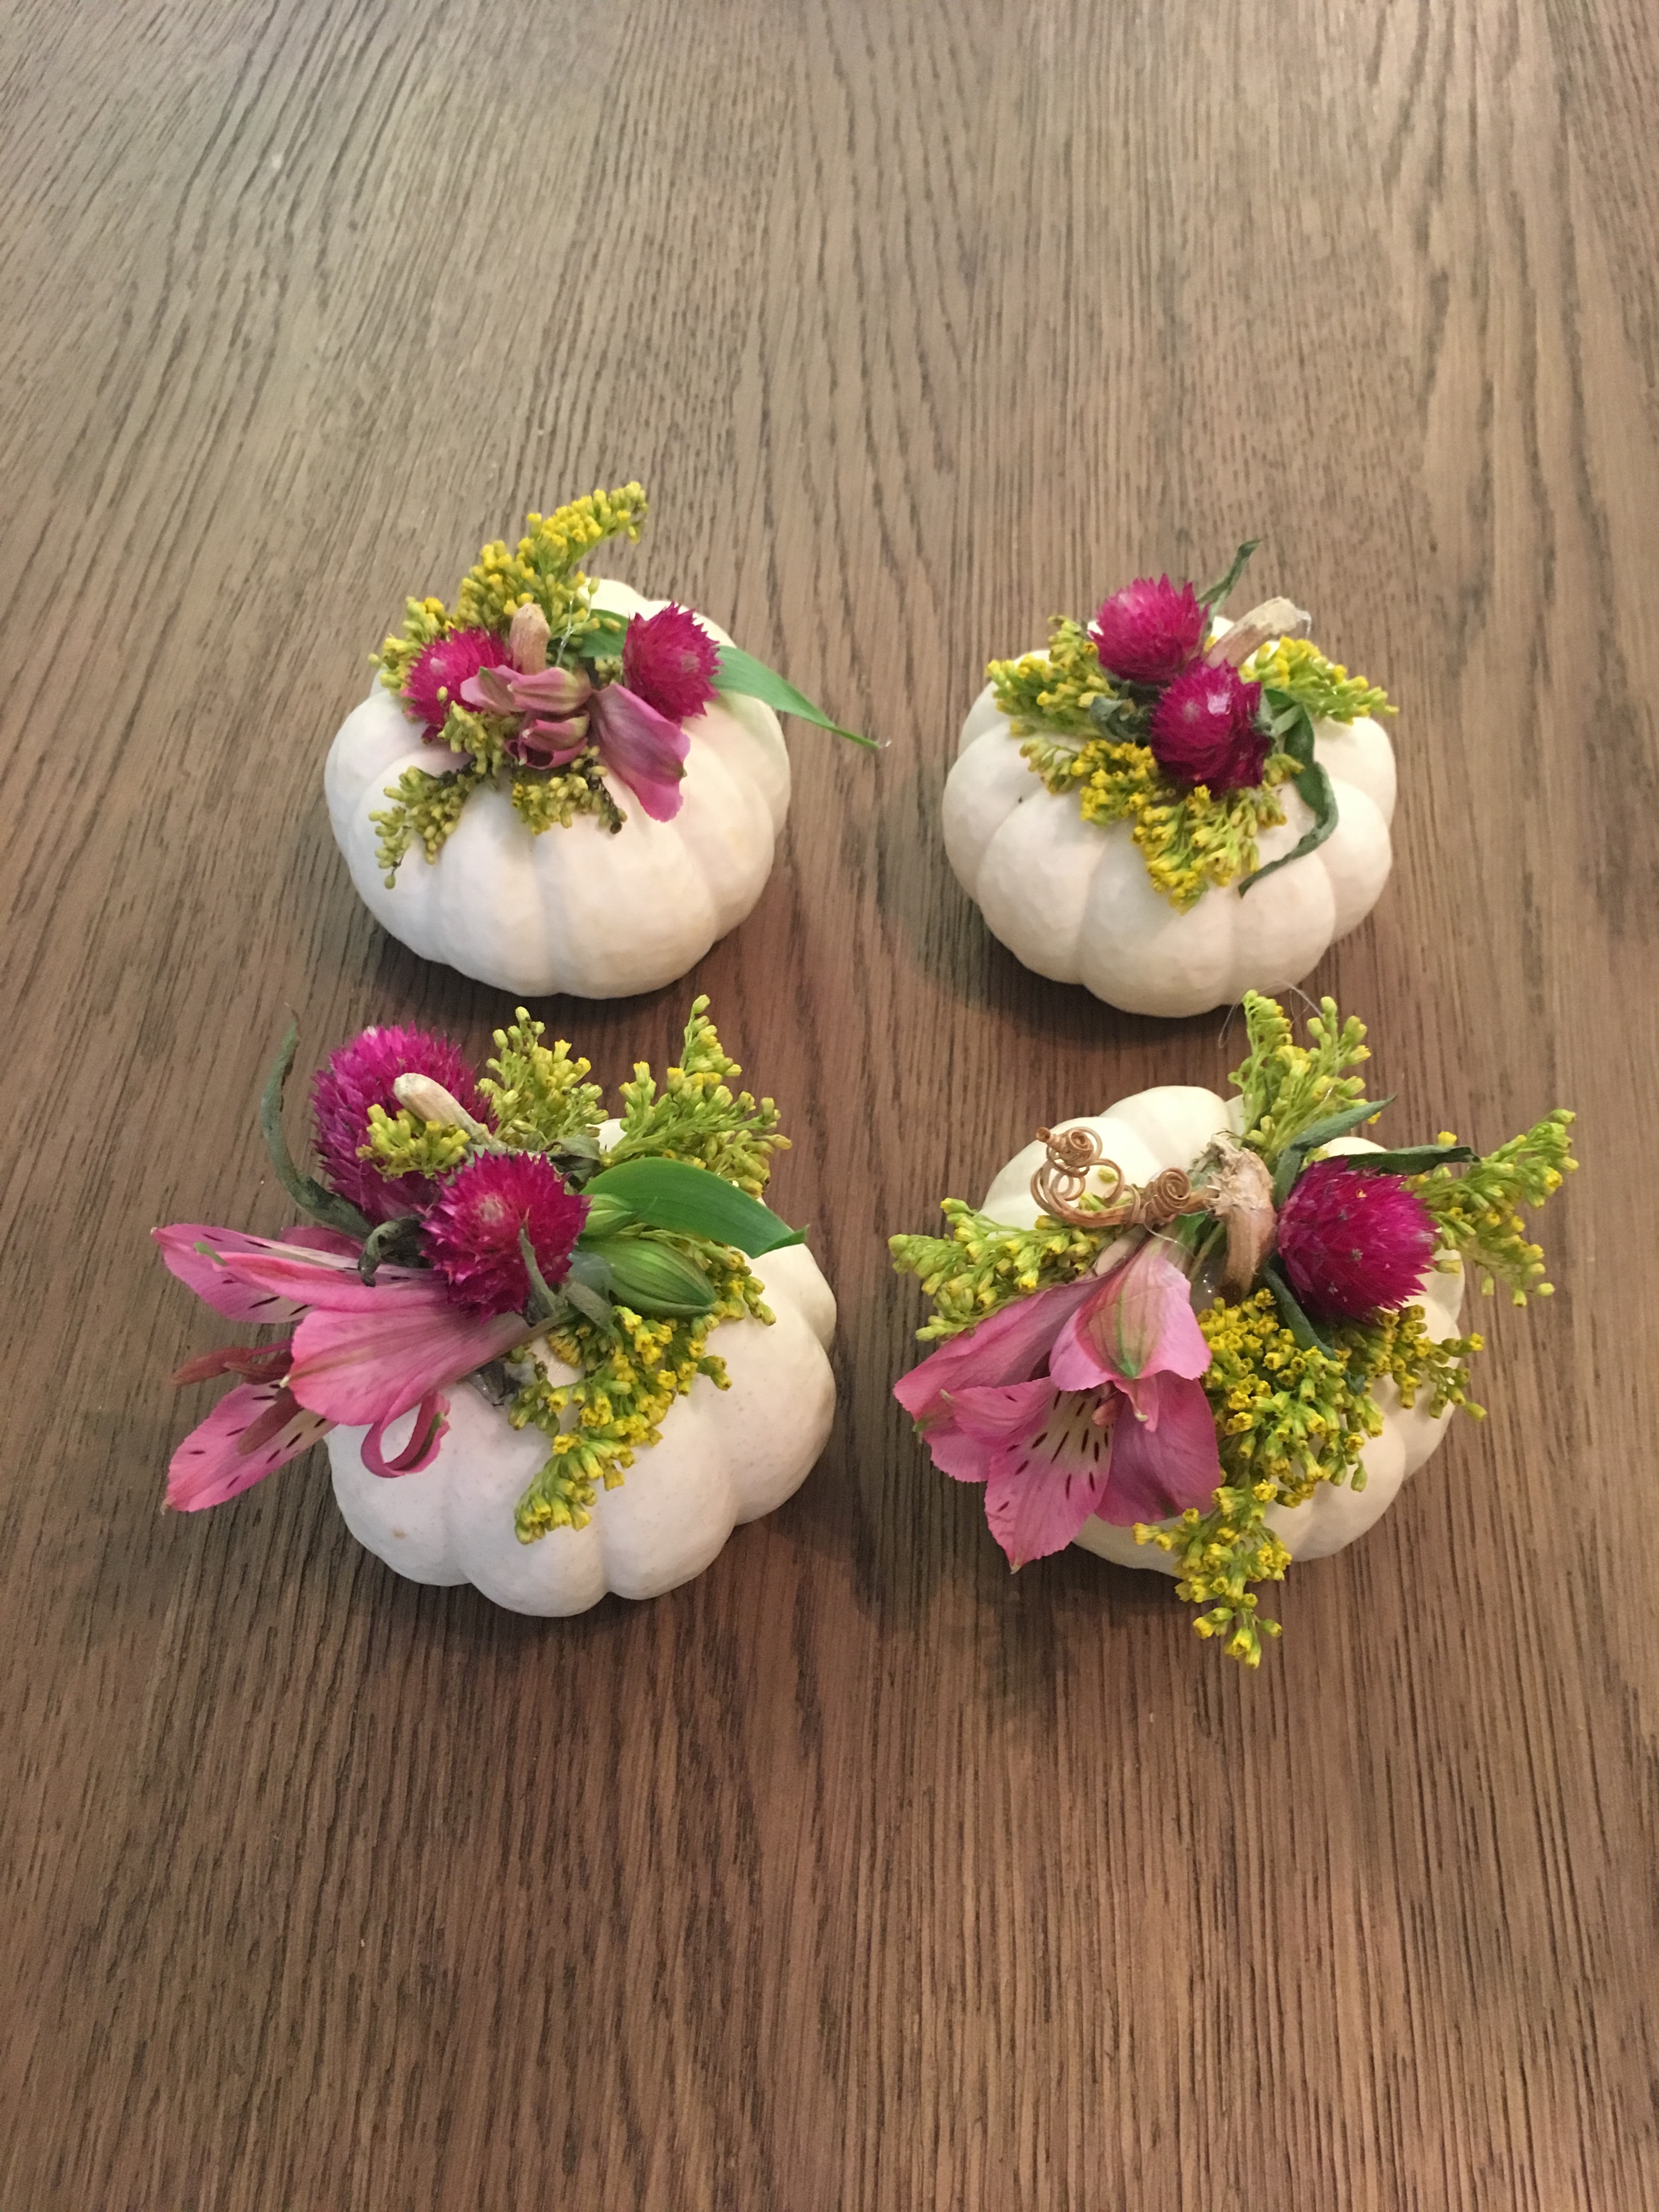
Once you’re done, do the same with the rest of your mini pumpkins. Each one should only take about 5 minutes to decorate, and before you know it, you’ll have a group of adorable, festive pumpkins to dress up your dining table or window sill. The best part? These decorations should last all season! The flowers might dry out a little but they’ll still look great in four weeks.
Now, on to the next! What you’ll need for DIY #2:
- 1 small-sized {but not mini!} pumpkin. I like to use sugar pumpkins because they’re the perfect size and cheap!
- Fresh flowers {I love to use a mix of hydrangea and wild flowers, but choice whatever you like the look of!}
- Pumpkin carving knife
- 1 clean tin can
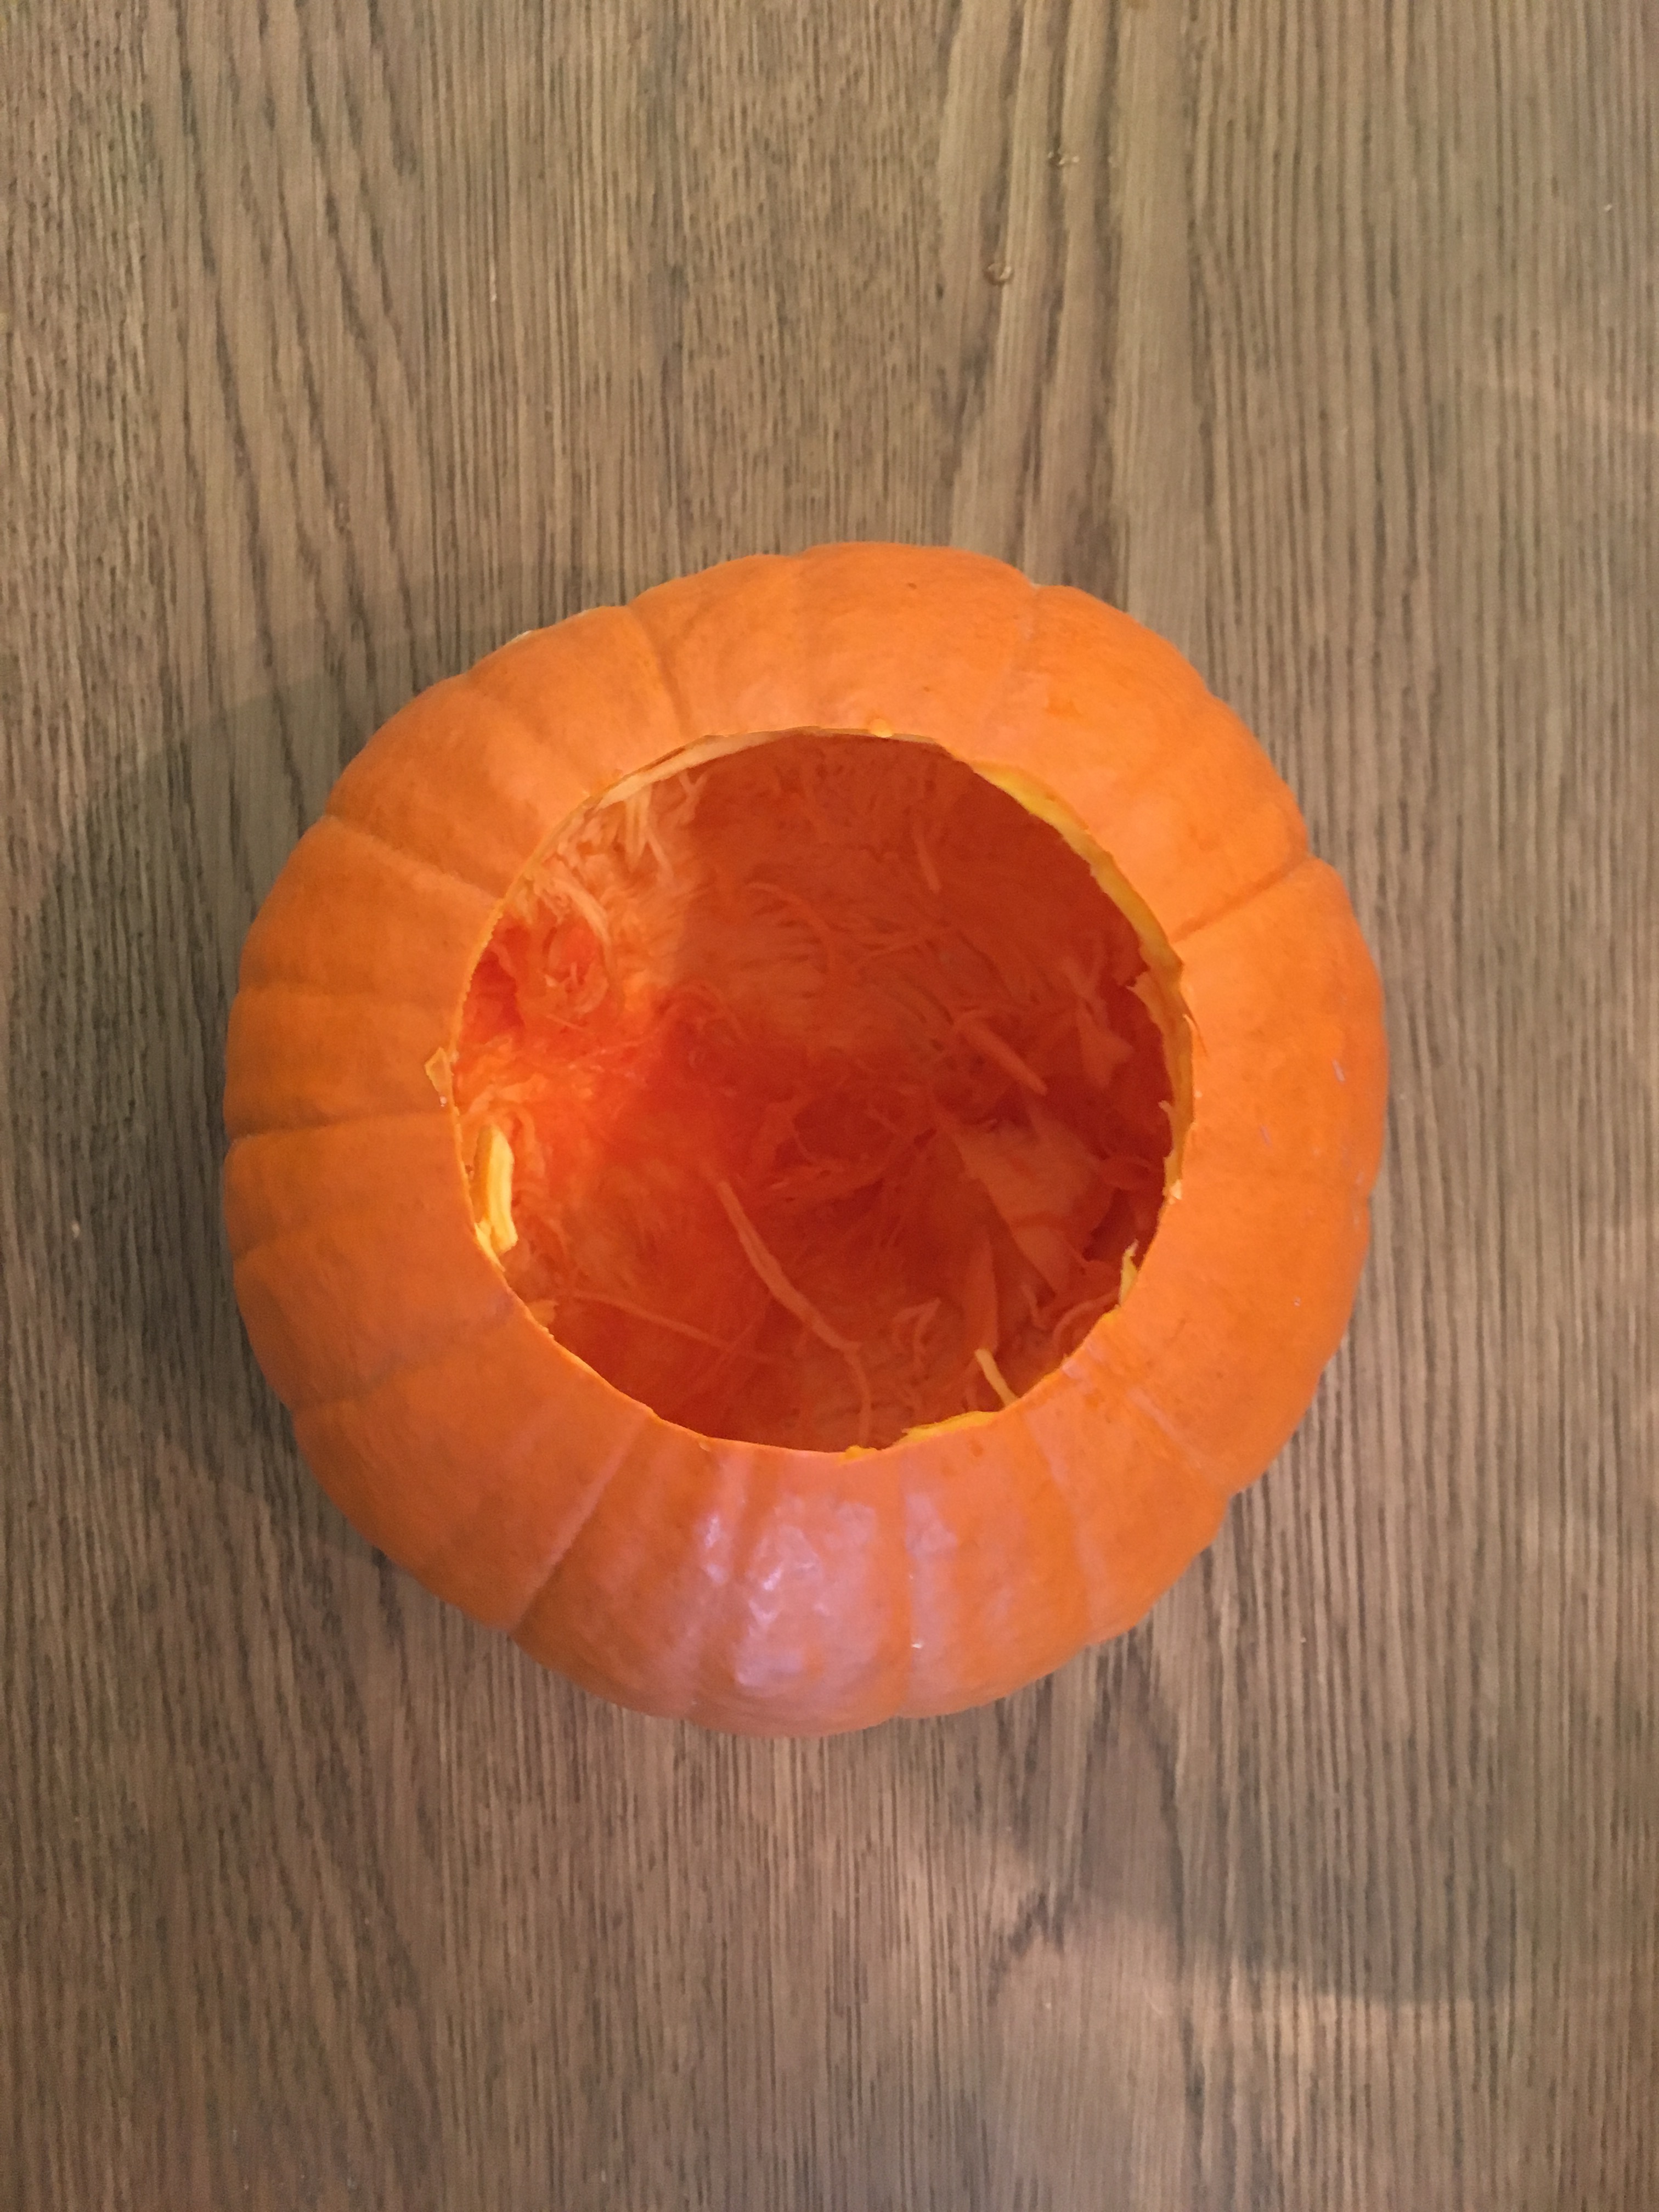
First, cut off the top of your pumpkin just as you would if you were carving it. Try to make the hole that you’re carving just large enough to fit a small tin can inside the pumpkin. Next, remove the innards {and save your seeds for baking – seriously, they’re such a yummy snack!}. Your pumpkin should look like this:
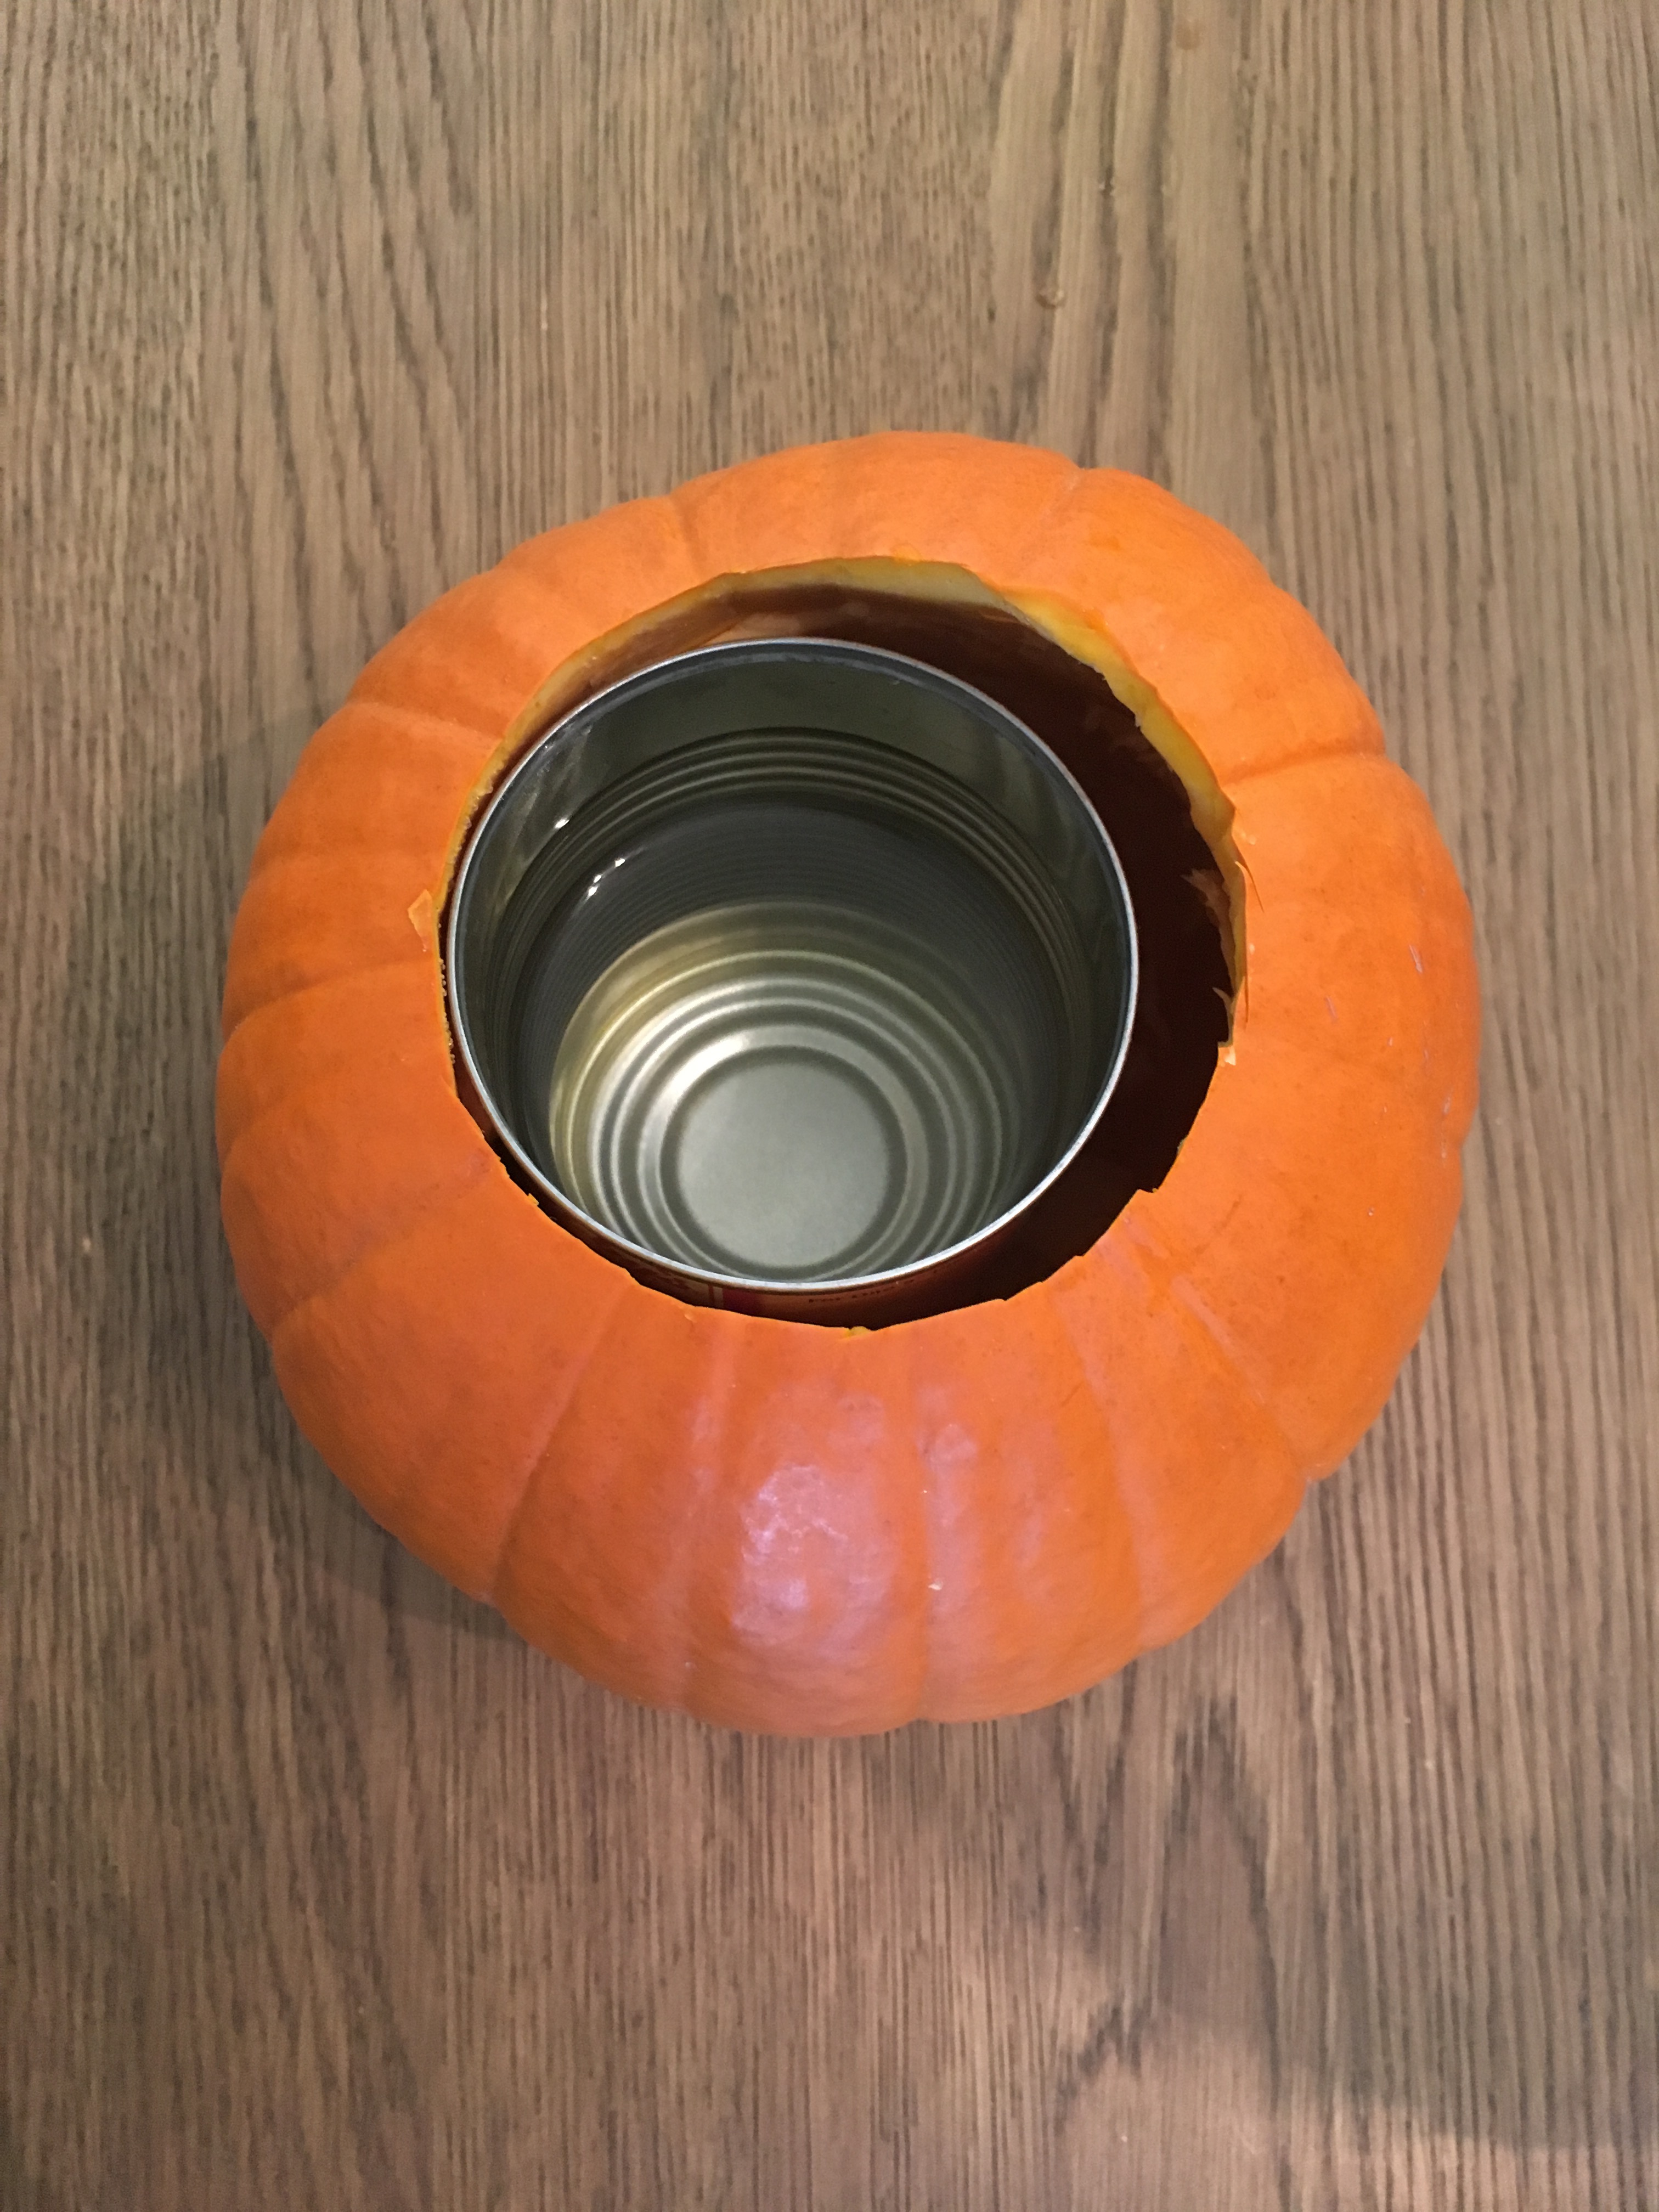
Next, take your tin can and fill it half-way with water before placing it inside the pumpkin.
Lastly, fill the tin can with your assortment of fresh flowers. I love to use hydrangea in my bouquets because they’re so lush, but you can use anything.
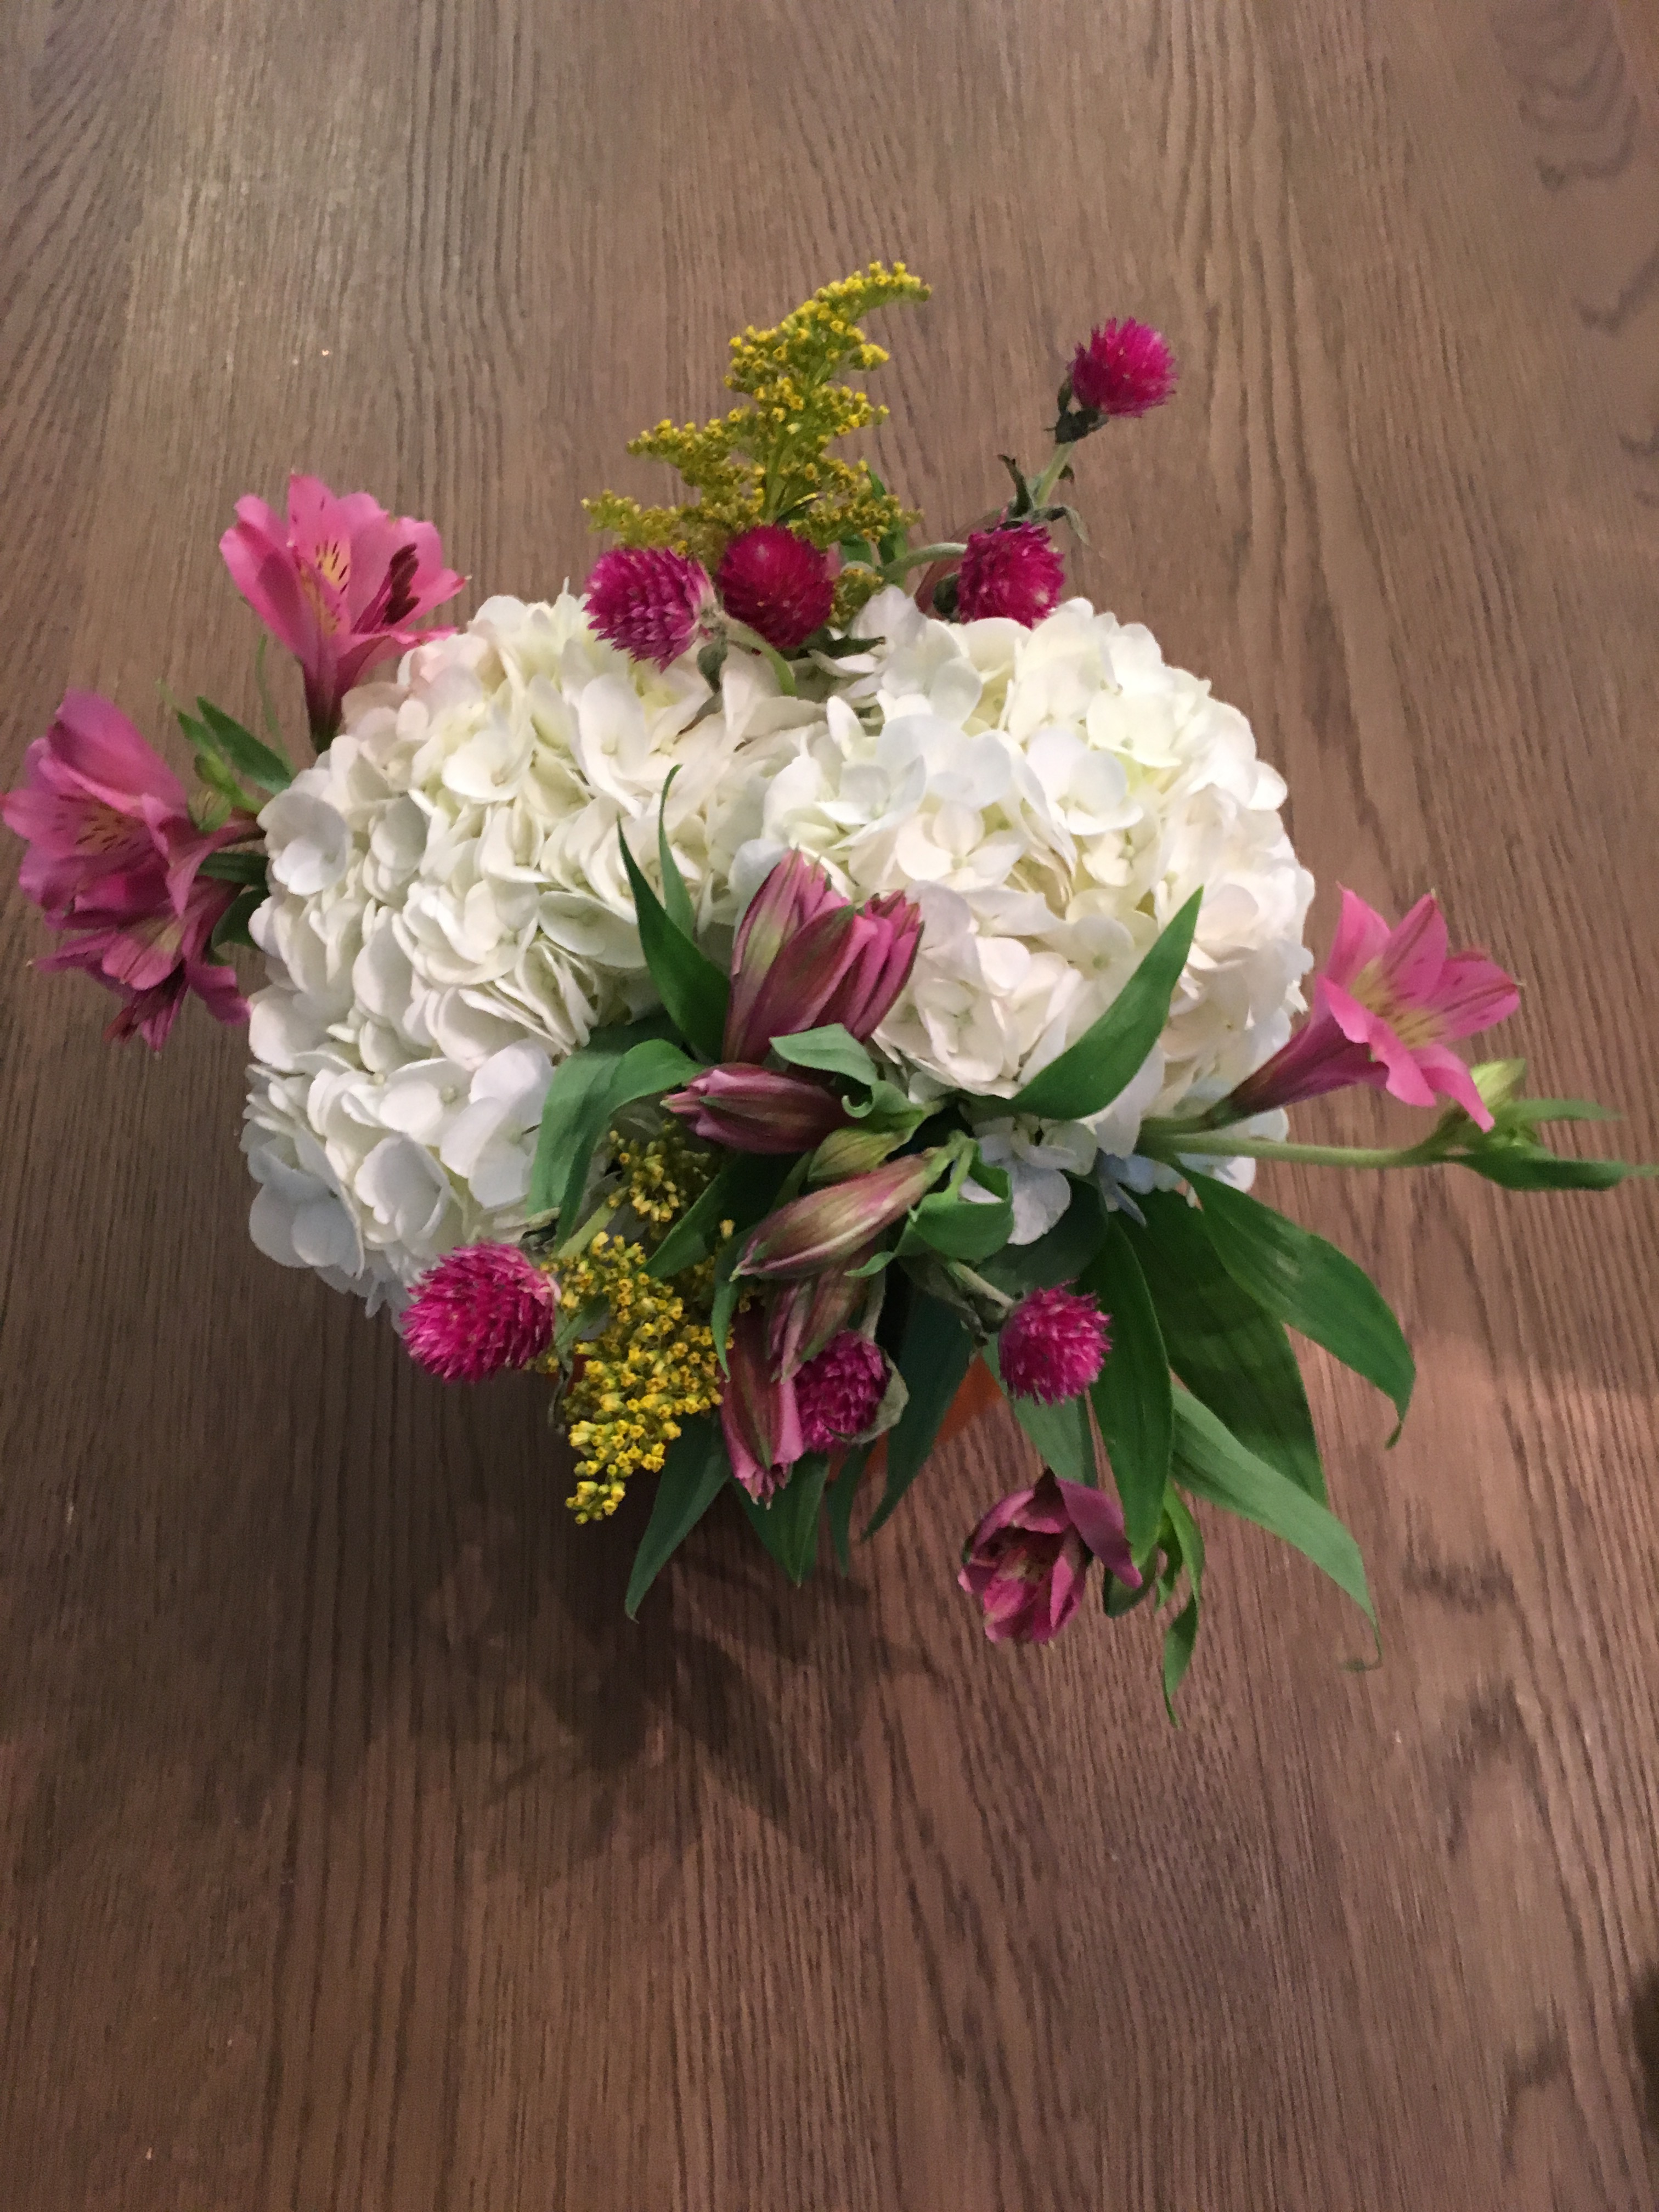
For this particular project, I chose white hydrangea as the main star and then added some pink, purple, and yellow wildflowers.
The tin can is the perfect vessel for flowers because it makes it easy for you to change the water. Pro tip: If using hydrangea, make sure to fill the tin can with hot water each morning. This will keep your flowers looking fab for 1-2 weeks {if they sit in cold water, they’ll wilt in a day!}
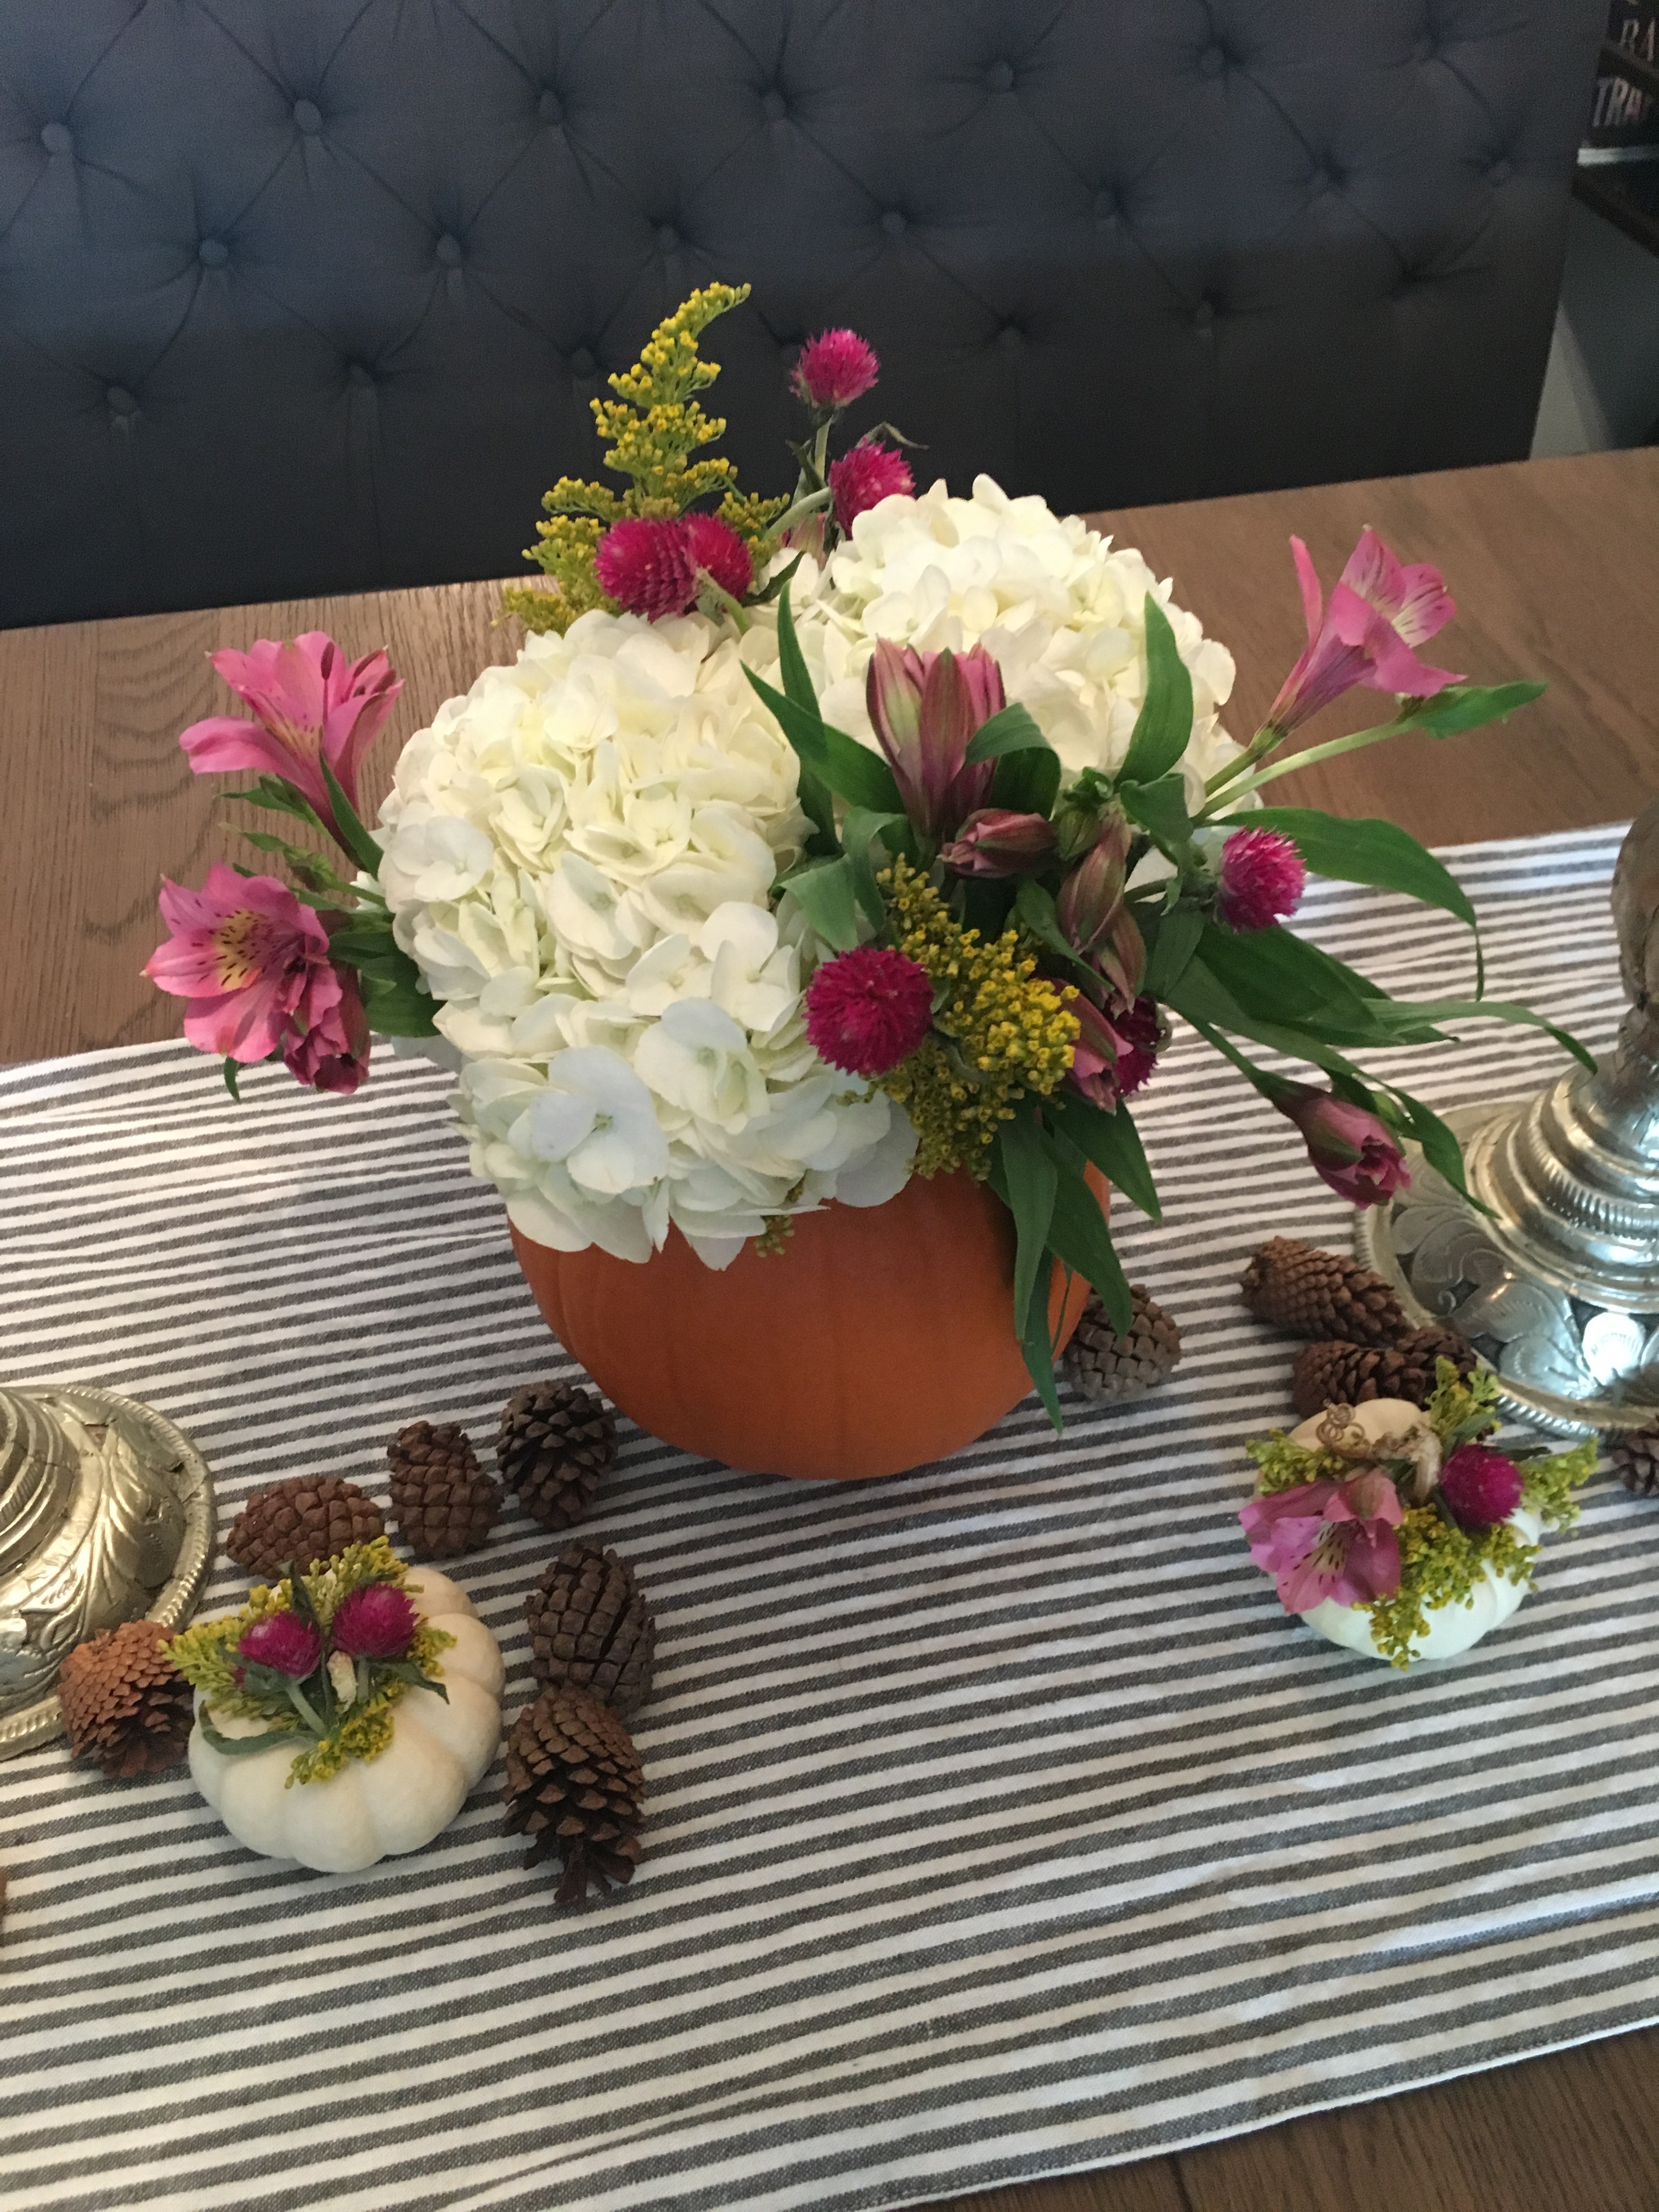
These DIYs are cute on their own, but when paired together, they make a gorgeous tablescape that’s both sophisticated and rustic. See below for some styling inspiration:
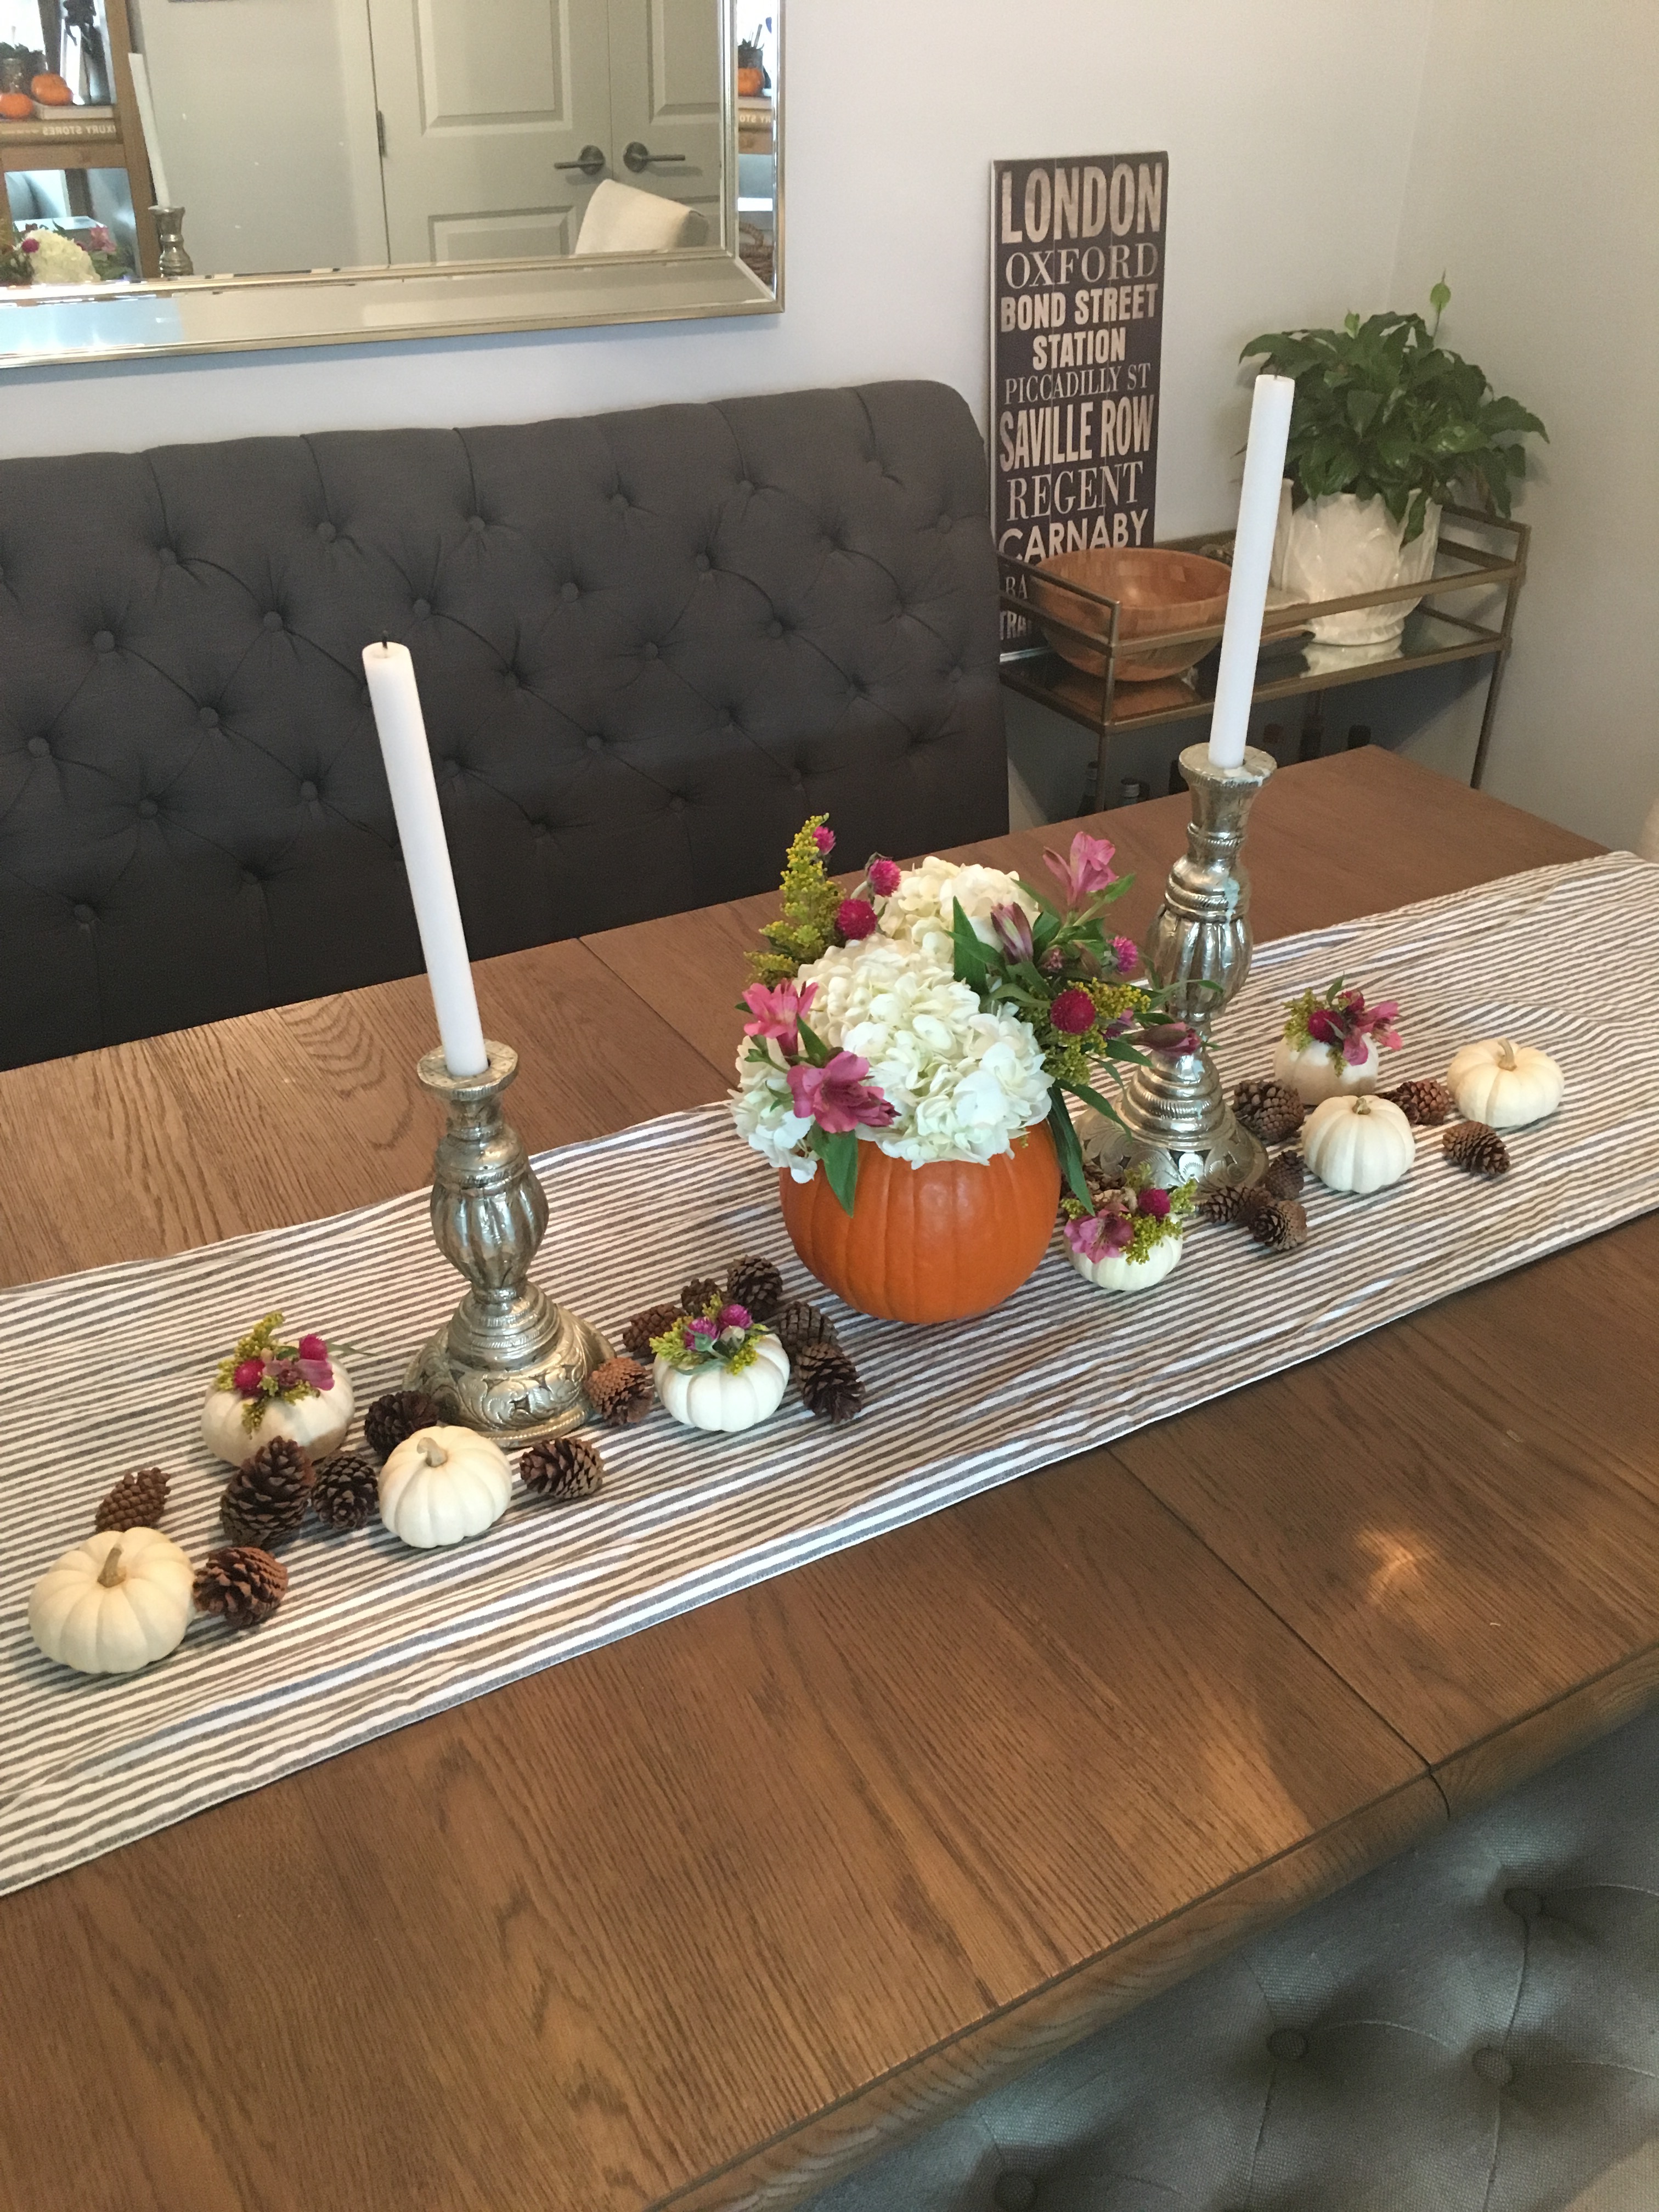
What do you think?! We’d love to see what you guys create so tweet us or tag us in your pics {@HobokenGirlBlog}! And for more DIY and design inspiration, check out Michelle’s design blog at GirlontheHudson.com.
A Guide to Flower Shops in Hoboken + Jersey City

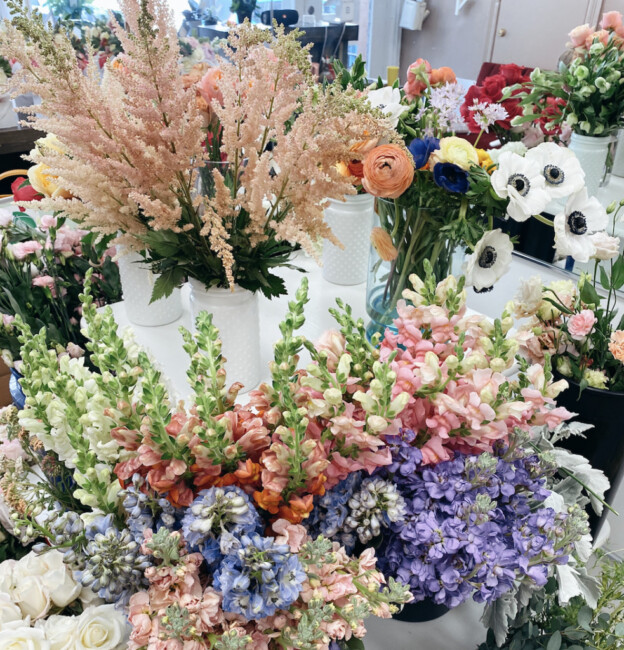
There's really no time or occasion that isn't improved by flowers. Even a mundane Tuesday can be brightened up with a seasonal arrangement. Here in Hoboken and Jersey City, we are spoiled for choices when it comes to florals in different styles. From classic to trendy to edgy, or even dried, there is a flower shop for any type of recipient. We've rounded them up here, so maybe bookmark this article next time you or someone you love is in need of a pick-me-up or a celebratory arrangement. Read on for a guide to local Hoboken + Jersey City flower shops.

Hoboken
Beethoven's Veranda | 108 Tenth Street
View this post on Instagram
Beethoven's Veranda is where you can find both potted and fresh flowers, as well as other charming treasures for your garden or home. Owner William Wurch uses locally grown orchids and freshly cut flowers for his stores and has a wealth of knowledge about the care of flowers and plants.
Read More: A Guide to the Unique Boutiques in Hoboken + Jersey City
Bloomie | 107 4th Street
This florist specializes in sustainably-minded floral arrangements and provides both fresh and dried floral options. Bloomie’s has same-day delivery services throughout Hoboken, Jersey City, and NYC.
Flowers by Diane | 109 2nd Street
View this post on Instagram
Flowers by Diane has been serving Hoboken for over 20 years. This shop provides both fresh-cut flowers as well as a lush selection of low-light plants suitable for apartment living. Diane also keeps fresh tulips in her store all year round, radiating a touch of spring in any season.
Flajes Flowers | 1214 Washington Street
View this post on Instagram
Flajes Flowers in Hoboken is an expert in roses and has a wide variety of blooms, plants, and personalized arrangements. The flower shop even has same-day delivery in addition to wholesale flowers and custom designs for weddings and events.
Hoboken Florist | 50 Harrison Street
Hoboken Florist's staff has decades of experience in the floral game. The shop carries everything from flowers to candles, balloons, chocolates, and more. Same-day delivery is also available.
Hudson Flowers | 92 Hudson Street
View this post on Instagram
Hudson Flowers has endless options for flowers. Customers can create their own bouquets or buy one pre-made.
Le Fleur Couture | 1450 Washington Street
View this post on Instagram
Le Fleur Couture is located inside Cork Wines + Spirits on Washington Street in Hoboken. The flower selection is a reflection of talented founder, Margarete Caldiera's passion for beauty, perfume, and flowers. Le Fleur Couture offers local delivery and has everything from bouquets, arrangements, terrariums, baskets, and brunch set ups.
Mac + The Mushroom | 1012 Grand Street #13
View this post on Instagram
Mac + The Mushroom is a one-of-a-kind floral design studio that uses eco-friendly practices in their sourcing process. Founder, Kim Kachouglan was even awarded an Emmy for her outstanding floral decorations on the set of Saturday Night Live. Mac + The Mushroom covers floral design for events, weddings, parties, photoshoots, and more. Order inquiries can be sent here.
Mela Fleurs | Online
View this post on Instagram
Mela Fleurs is a chic sustainable floral design bar that sells custom and pre-made dried flower arrangements.
Park + Bloom | 1012 Grand Street
View this post on Instagram
For special occasions, check out Park and Bloom for beautiful floral arrangements. The team’s wedding arrangements and bouquets are to die for.
Plan G Florals | Hoboken
View this post on Instagram
Plan G Florals is a Hoboken-based floral design studio that specializes in wedding and event design. Plan G Floral’s founder Gina's love for floral design began during the pandemic. Her dad would return from the grocery store with a shopping bag full of flowers. The duo would then challenge each other to create unique floral arrangements. Eventually, it became something she looked forward to doing every week. Now, she has converted her passion into Plan G Florals. Her website has a variety of floral arrangement selections for occasions like Valentine’s Day, weddings, and more. To get in contact with Gina, click here to fill out an inquiry form.
SOHO Flower + Garden | 264 1st Street
View this post on Instagram
Whether you need flowers for a special occasion, or just picking up some to freshen up your apartment, this is the perfect spot for all your floral needs.
Jersey City
14th Street Garden Center | 793 Jersey Avenue
Here, you’ll find everything you need to start that fire escape garden, window box, or lush back garden you’ve been dreaming of.
301 Collective x Rudo Plants | 301 1st Street
View this post on Instagram
301 Collective is known for unique gifts and clothing, but recently, the store has collaborated with Rudo Plants + Home to bring some greenery into the space. As Rudo's second Jersey City location, the new inventory at 301 Collective includes fresh blooms, dried flowers, potted plants, and more.
Bouquets + Baskets | 548 Jersey Avenue
View this post on Instagram
Bouquets + Baskets is a flower and garden shop located in the heart of downtown Jersey City. It's a great place to pick up plants or fresh-cut arrangements.
Brennan’s Florist | 222 Newark Avenue
View this post on Instagram
Brennan’s Florist is an Irish family-owned shop that sells fresh-cut flowers. Delivery is available throughout Hudson and Bergen Counties.
Exchange Place Florist | 33 Hudson Street
View this post on Instagram
Exchange Place Flowers in Jersey City has plenty of charm and a wide variety of fresh-cut stems and succulents available.
Flor y Cafe | 413 Central Avenue
View this post on Instagram
Flor y Cafe in Jersey City Heights has expert florists that can create arrangements for any occasion. Flor y Cafe also serves fresh single origin coffee from Puerto Rico and provides same-day flower delivery.
Flower Now | 285 Central Avenue
Flower Now in Jersey City Heights has flower arrangements for any occasion. With everything from bouquets to elaborate wedding arrangements, the flower shop has dozens of options to choose from and even offers same-day delivery.
Joseph's Florist | 222 Newark Avenue
View this post on Instagram
The team at Joseph's Florist are experts in the art of expression. With everything from corsages and boutonnieres, bouquets, and event arrangements, Joseph's Florist has something for every occasion.
Karma Floral + Event Design | 210 9th Street C2
View this post on Instagram
Karma Floral designs unique bouquets and arrangements with a wildflower-y feel. The shop can make arrangements for any event.
Made of Leaves | 195 New York Avenue
Photo Credit: Meghan Kramer
Made of Leaves is a whimsical boho-chic event florist based in Jersey City Heights. Fill out the inquiry form on the website here if interested in booking for a wedding or event.
Noah’s Ark Florist | 200 Hudson Street
View this post on Instagram
This little boutique flower shop considers its style "contemporary design with old-world charm." Call 201-521-1031, shop online, or visit the shop in the Harborside Financial Center to pick up a bouquet.
Rudo Plants + Home | 394 Palisade Avenue + 301 1st Street
View this post on Instagram
Rudo Plants + Home's original location in Jersey City Heights is filled with highly-curated houseplants, flowers, and home decor. The shop recently expanded to Downtown Jersey City in collaboration with 301 Collective with even more plant magic to love. Rudo also has special blooms and bouquets for special occasions and more.
See More: A Guide to Boutique Floral Shops in the Montclair Area
Unique Creations Flower Vending Machine | 30 Mall Drive West

Elizabeth-based flower shop, Unique Creations, launched a one-of-a-kind flower vending machine in the Newport Centre Mall last fall. The refrigerated vending machine holds ten flower arrangements that can be taken home instantly by the press of a button. The vending machine can be found on the ground floor of Newport Centre right across from Kohl’s.